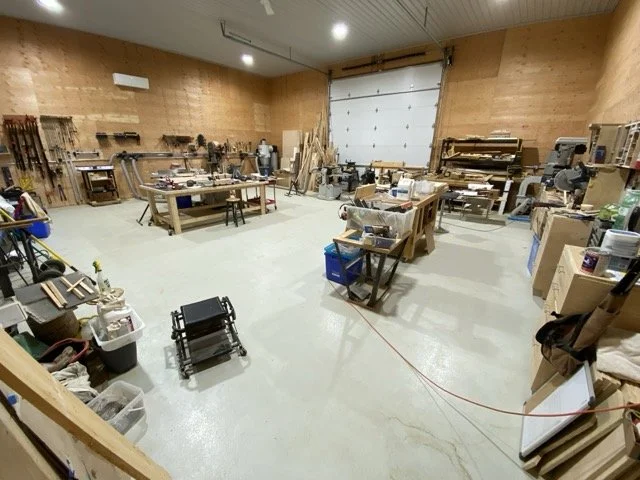
The Build Process
Each instrument is constructed entirely by hand, following a deliberate, unhurried process that prioritizes structural integrity, responsiveness, and refinement over speed or volume.
A Zarum guitar is not assembled.
It is cultivated.
The process begins long before an instrument takes shape, with the sourcing of exceptional tone woods from around the world—spruce, cedar, cypress, rosewood, maple and walnut selected for acoustic potential, structure, and long-term stability. Alongside these traditional sources, select woods are harvested from property owned by Zarum, allowing complete continuity from living material to finished instrument.
Once selected, the wood enters a long period of preparation. Tonewoods are processed, cut, and seasoned in-house, then carefully dried in a kiln designed and built by Zarum specifically for instrument woods. This controlled environment allows moisture, tension, and movement to settle naturally, ensuring each piece is ready not just for construction, but for decades of musical life.
Only then does building begin.
Each guitar is made entirely by hand, one at a time, using time-honored Spanish construction methods refined through years of woodworking experience and informed by an artist’s understanding of form, balance, and restraint. Traditional techniques are respected, while lessons learned from fine woodworking and visual art guide decisions of mass, stiffness, and structure. Nothing is rushed. No step is performed before the material is ready.
Flamenco guitars are built for immediacy, clarity, and rhythmic authority. Classical guitars are voiced for depth, sustain, and expressive range. In both, the goal is the same: to create an instrument that is exceptional on its first day, yet intentionally constructed to deepen, open, and mature as it is played over years and decades.
Because of this approach, Zarum guitars are inherently limited. Only a small number can be built each year, dictated not by demand, but by time, attention, and material readiness. For this reason, prospective owners are carefully considered. Not everyone can own a Zarum guitar—and that is by design.
Each instrument is built to become inseparable from its player: an extension of their touch, their sound, and their musical identity. Over time, the guitar does not simply age—it evolves alongside its owner, becoming an integral part of their musical DNA.
This is the Zarum build process:
Measured in years, not hours.
Guided by material, not deadlines.
Built to last a lifetime—and beyond.
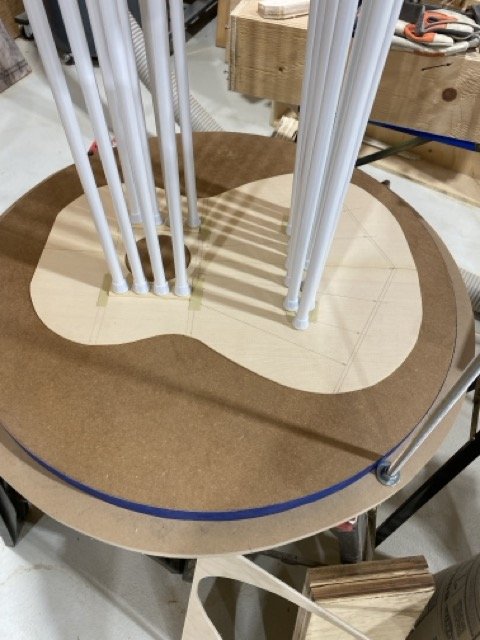
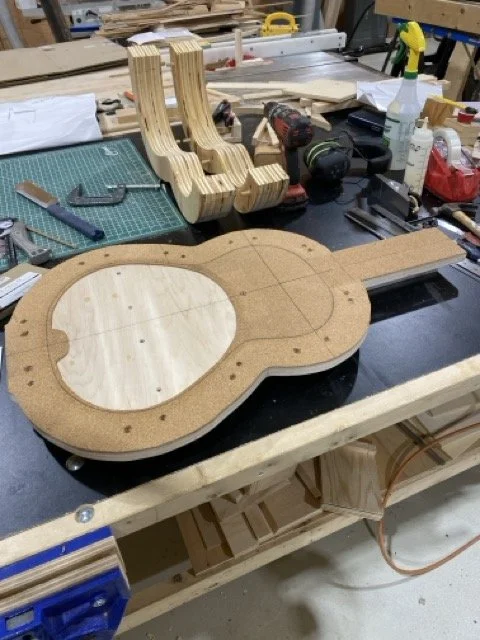
The SOLERA. The mould in which the guitar is assembled
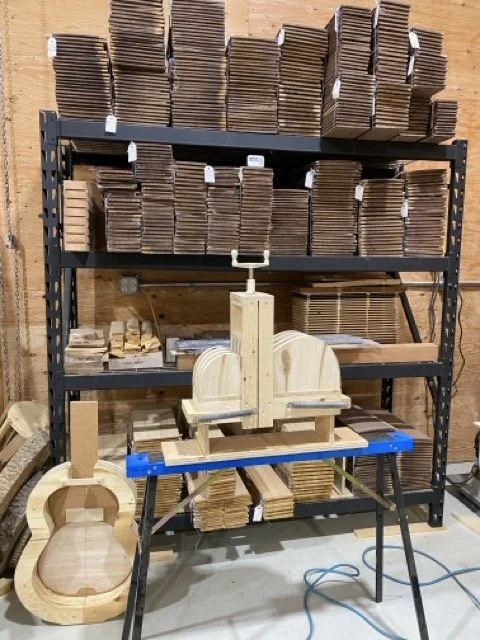
The SOLERA and next to it on the stand is the mould/press for the sides.

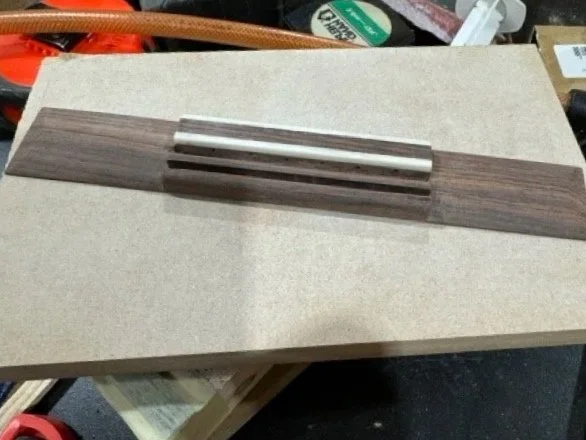
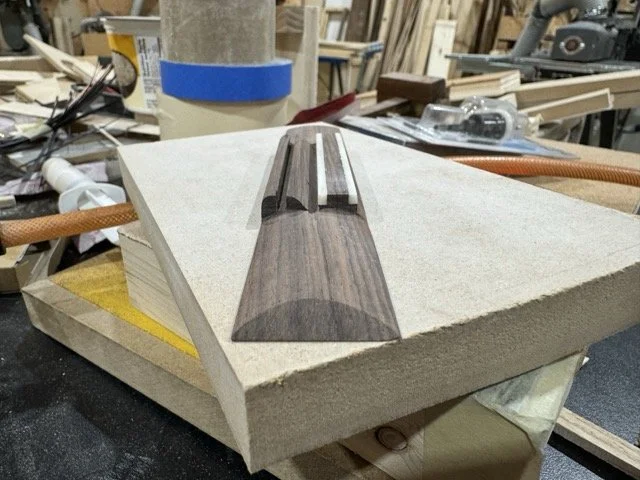
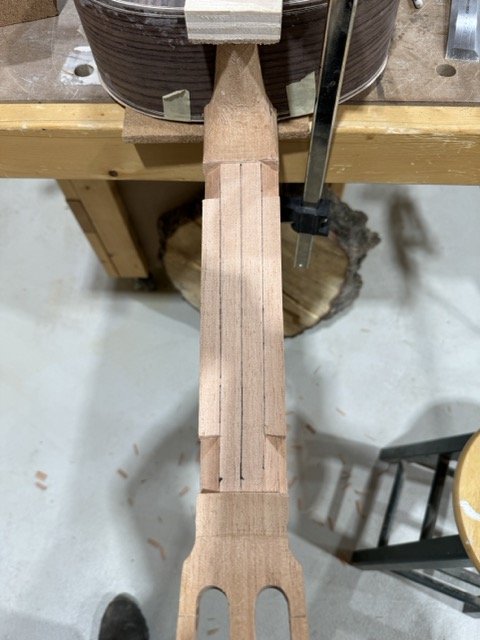
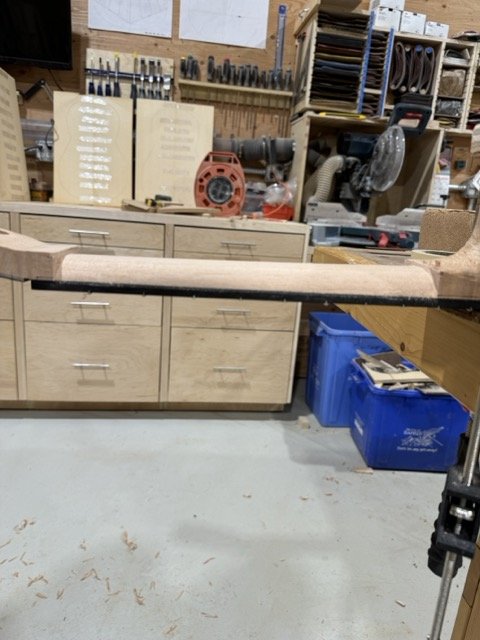
The Spanish Cedar black that has been cut into pieces and glued together to form the guitar neck
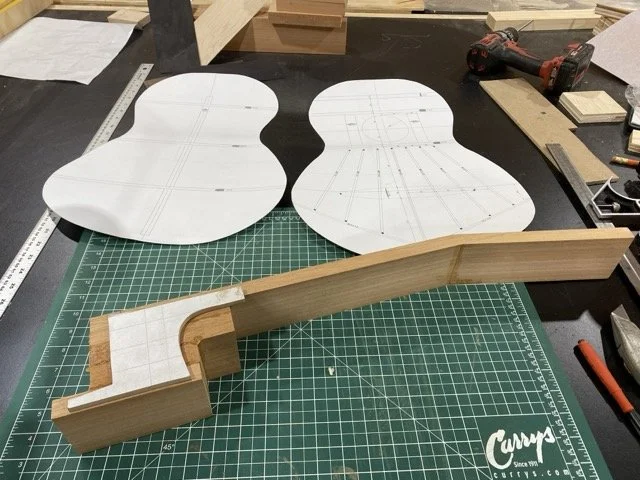
The guitar patterns

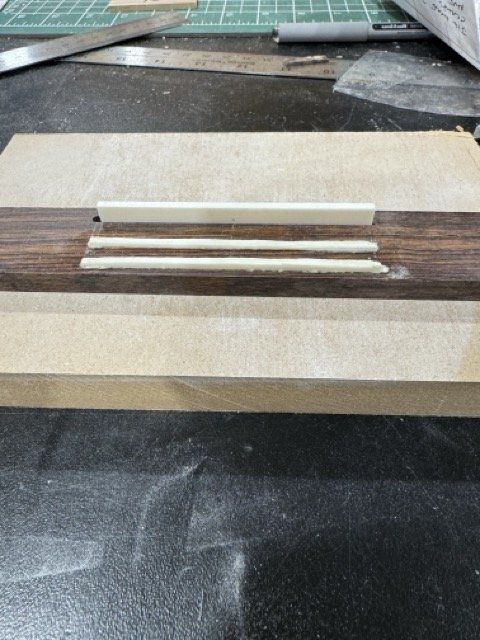
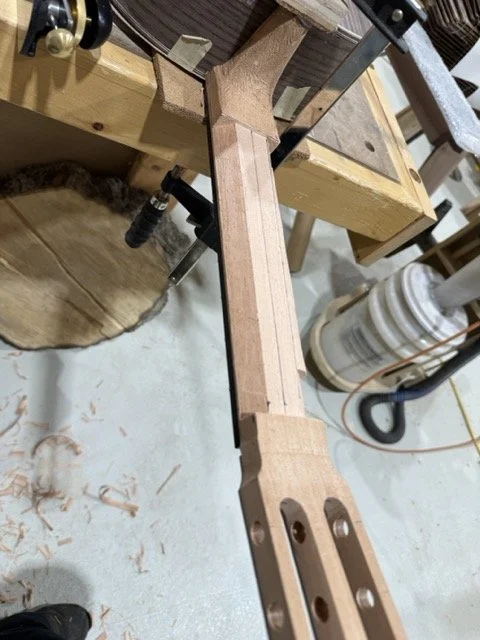
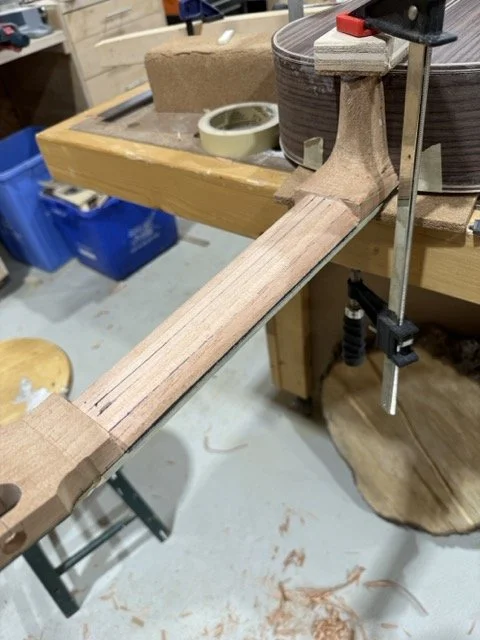
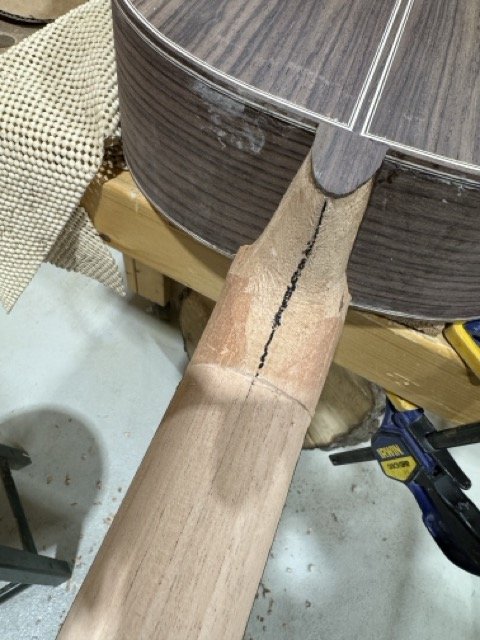
The neck blank showing the rosewood head plate glued as well as the slots for the sides which have been carved out with a chisel. Also seen is the ebony strip inserted into the neck to add stability.
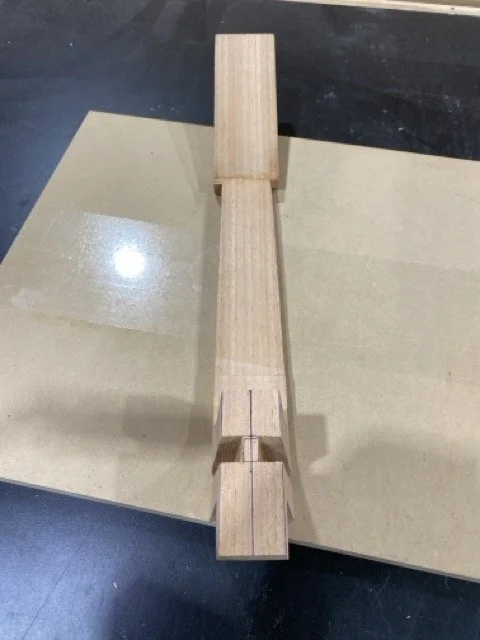
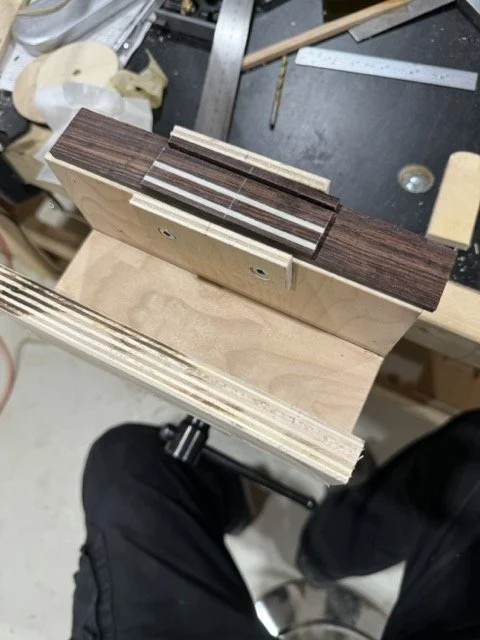
The back of the neck showing the slots chiseled for the sides to sit in
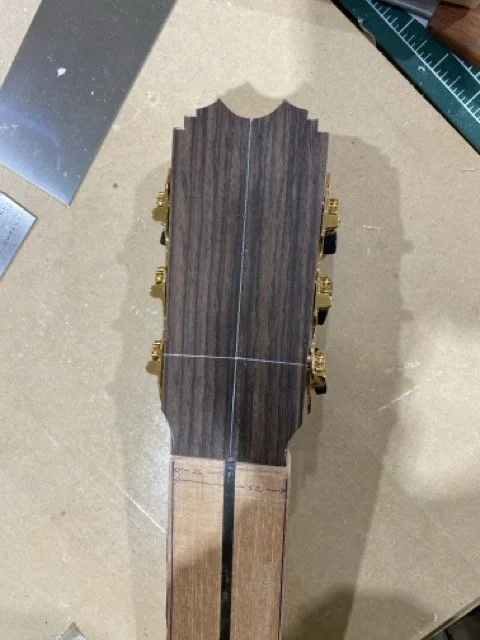
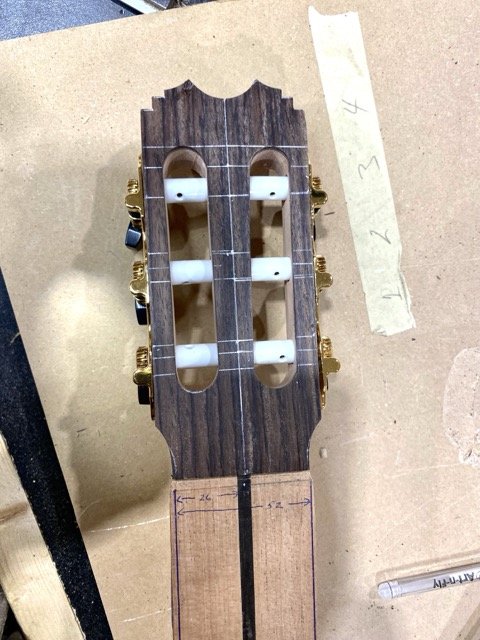
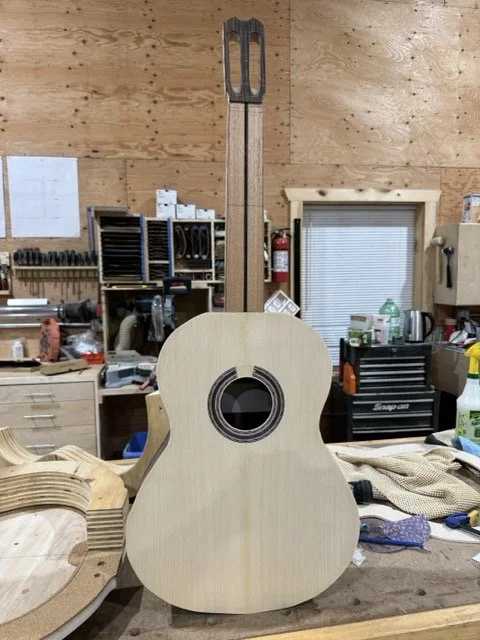
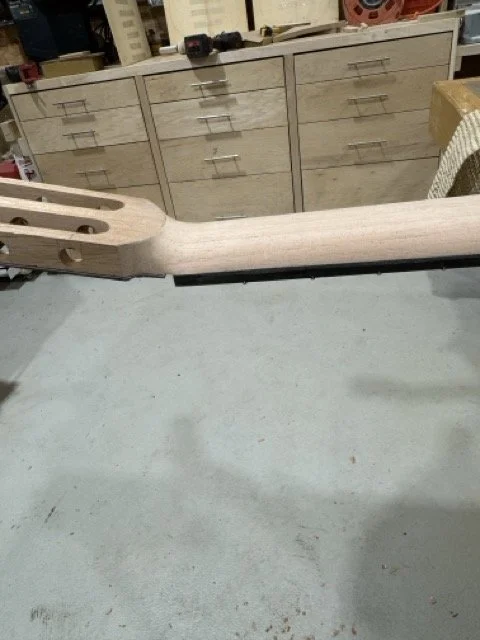
The head shown after the cutting of the ZARUM head design unique to Zarum Guitars
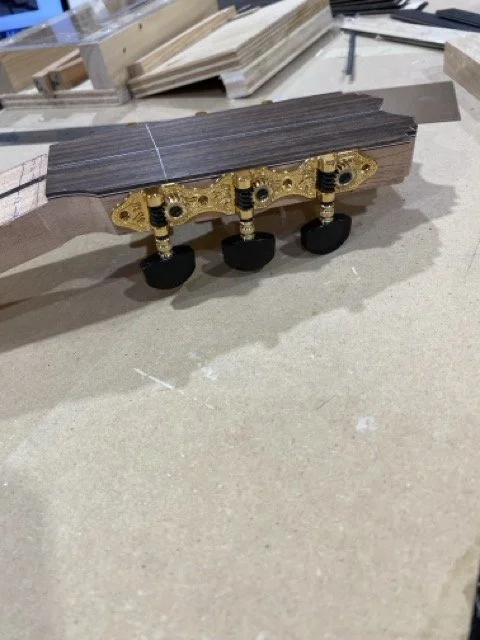
The tuners fitted to ensure proper function
After drilling out the tuner holes and cutting out the channels for the tuners a fit is done
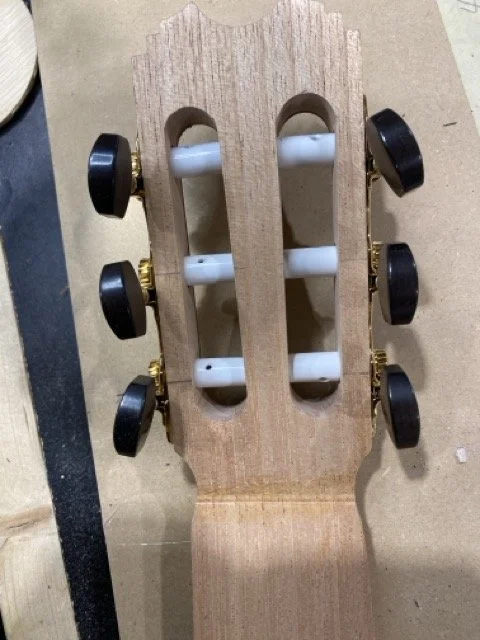
The back of the head with the tuners tested in place
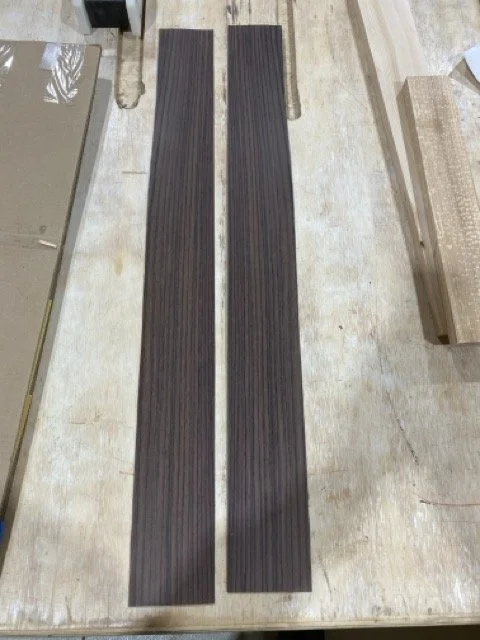
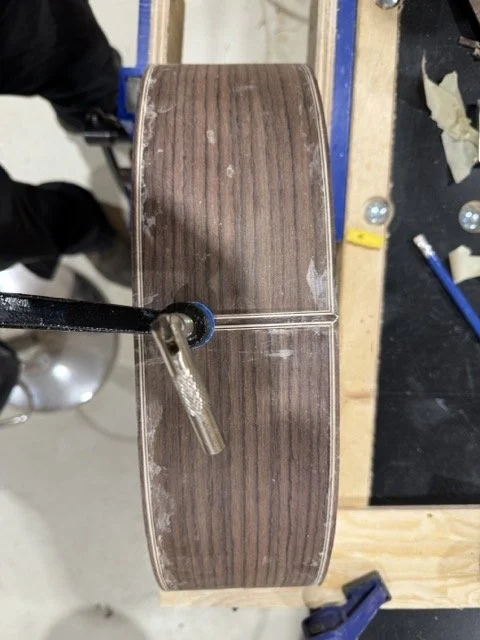
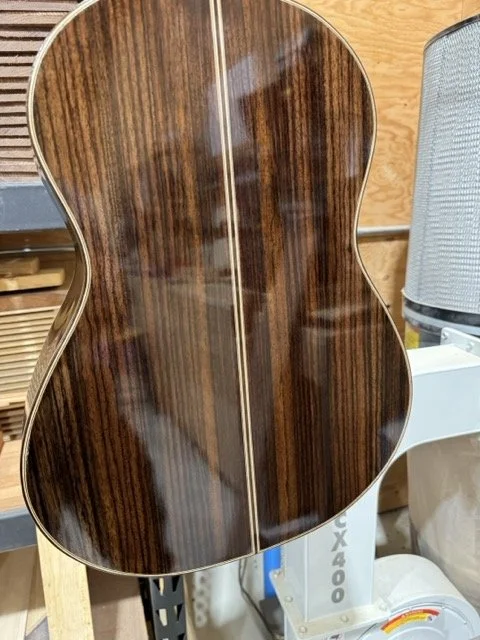
Banks of the guitar sides. Shown here is Indian Rosewood

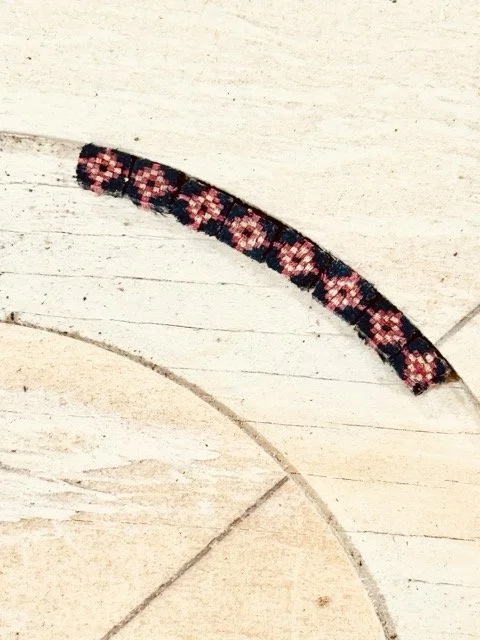
Drawing of one of the components for the Rosette which is the colourful and artistic 'band' around the sound hole made of .5mm pieces of coloured wood. Each square represents .5mm veneer

Cutting the coloured wood veneer blanks of .5mm wood for the rosette
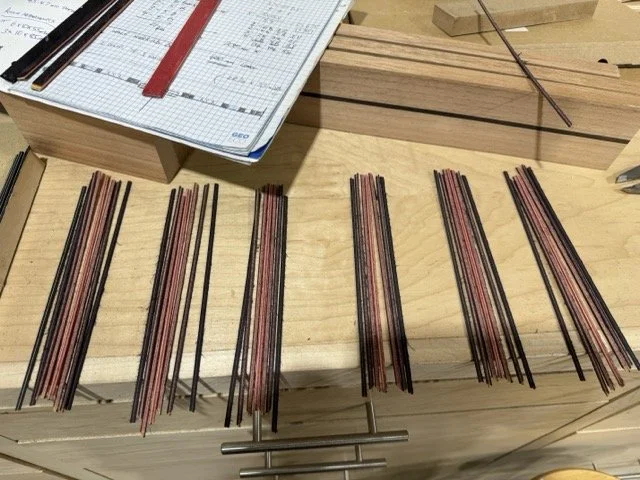
Cutting the blanks into strips
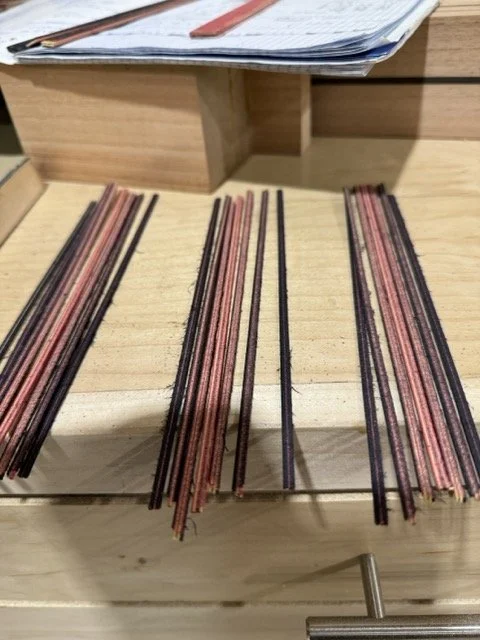
Aligning the strips to form a pattern
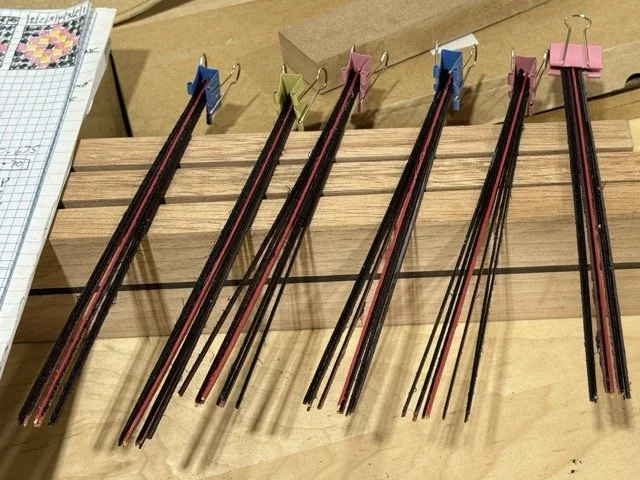
Once the patterns are formed , the are clipped together to ensure they stay in the proper order
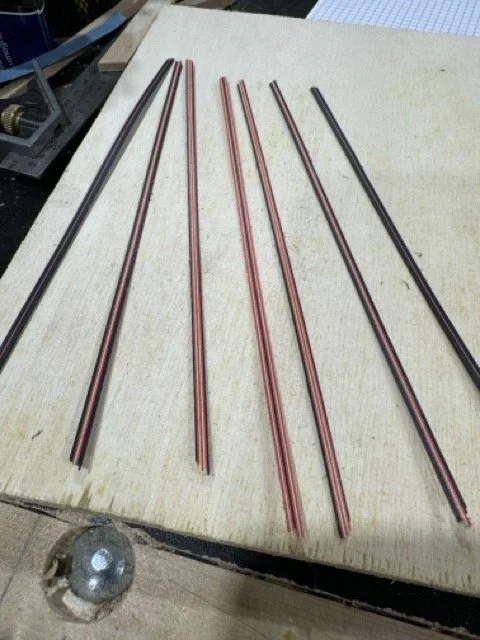
The patterns strips after they are glued together

They are then cut into tiny pieces which will be placed into the cutout around the sound hole to form the rosette
The pieces are placed one next to the other to form the pattern
On the soundboard of the guitar a channel is cut out and the pieces and strips of veneer wood slowly come together to form the finished rosette pattern
Top view of the rough rosette with the the components in place
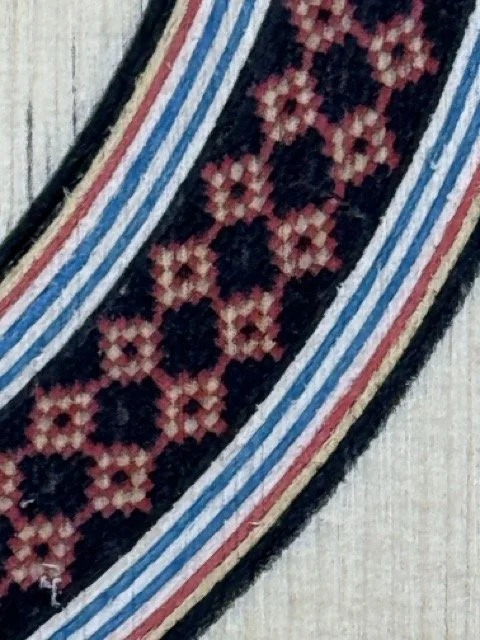
Close up of a finished rosette
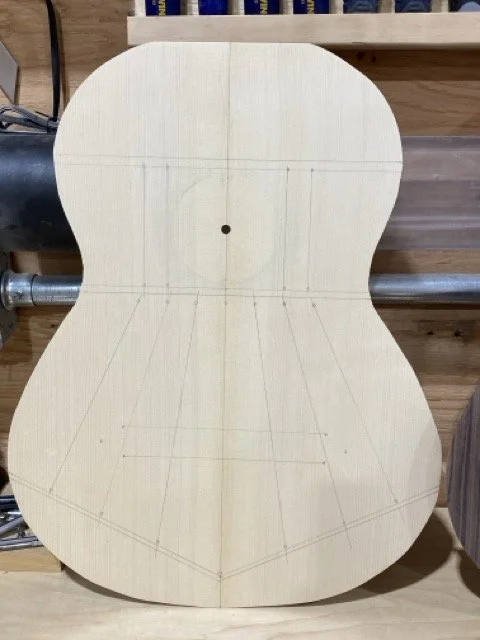
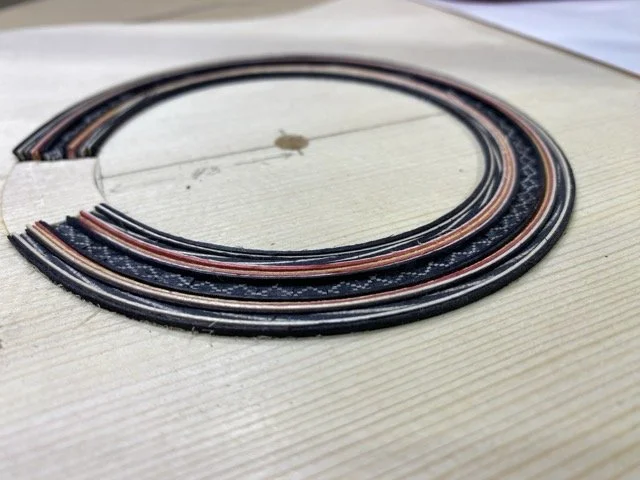
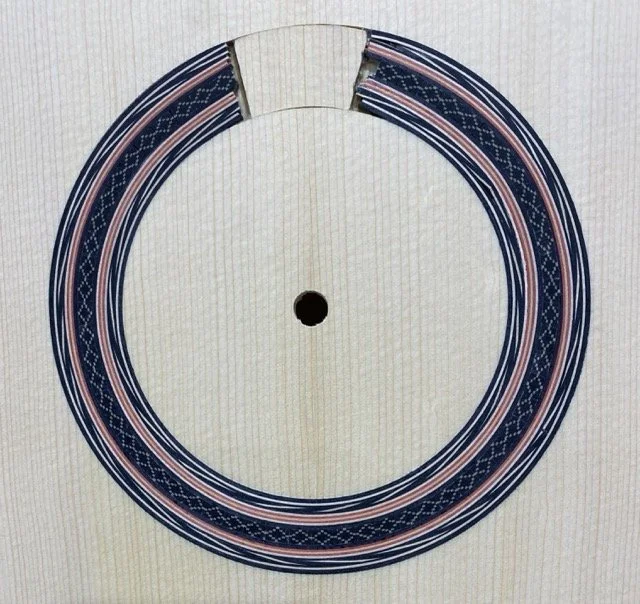
The soundboard with the rosette channel cut into it
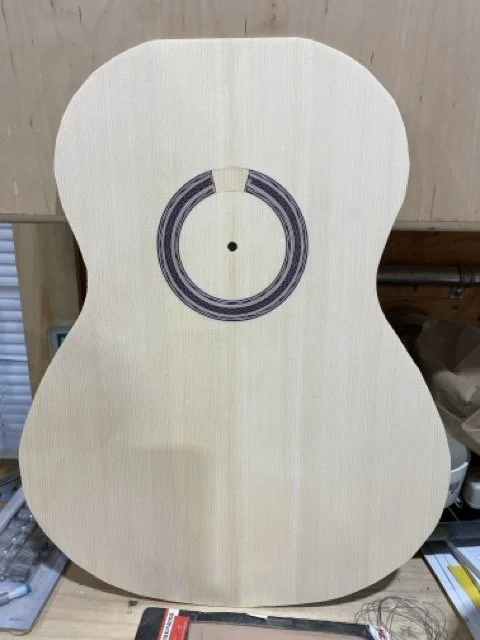
The soundboard and completed rosette
The interior harmonic bars and braces in the sound board are glued on a special 'plate' that is recessed to give the top of the guitar a slight dome in the large area below the sound hole
More harmonic braces and bars are glued to the interior of the sound board
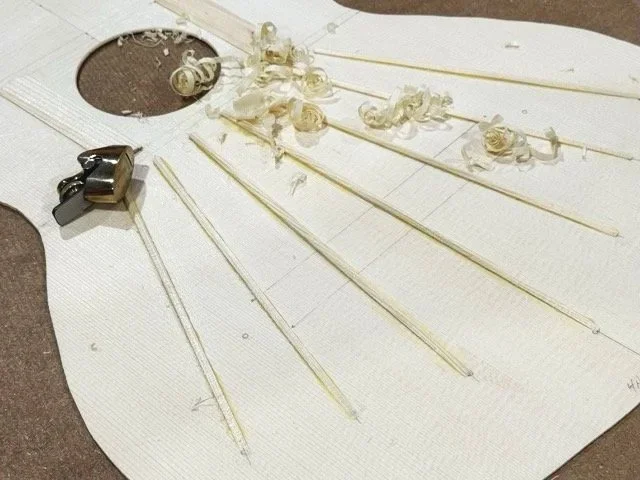
After gluing the harmonic braces and bars, they are fine tuned using a small luthiers plane
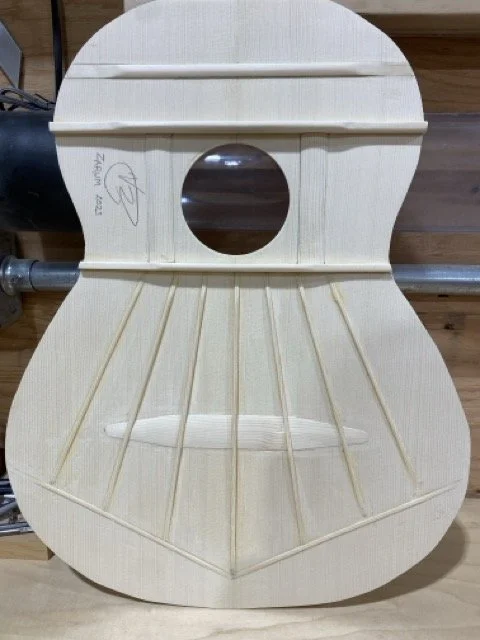
The completed interior of the sound board showing the harmonic bars and braces. Shown here is a Classical guitar pattern which differs slightly from a Flamenco guitar harmonic braces
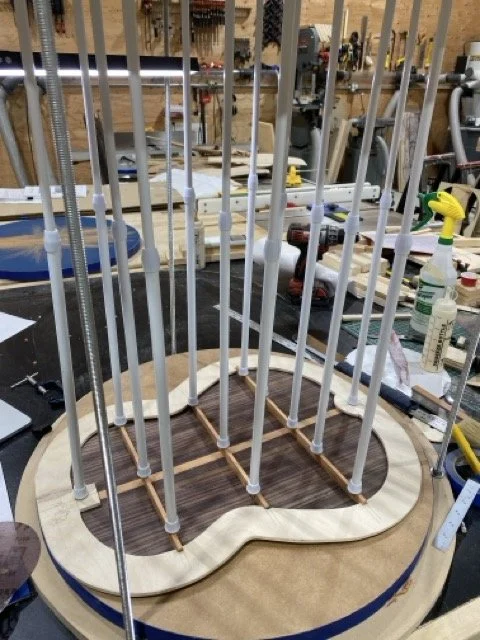
The back braces are glued to the interior of the back
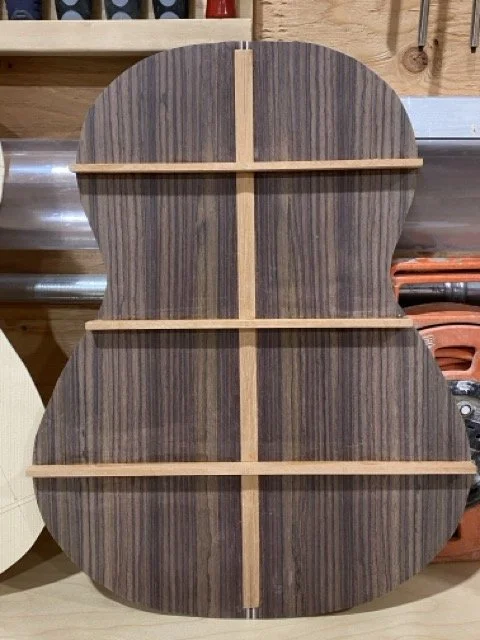
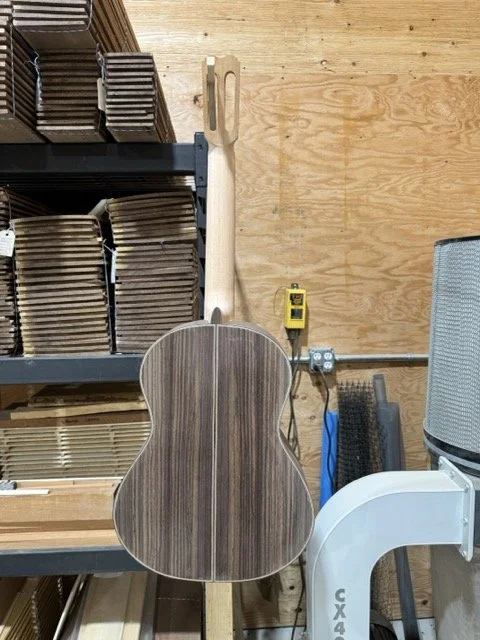
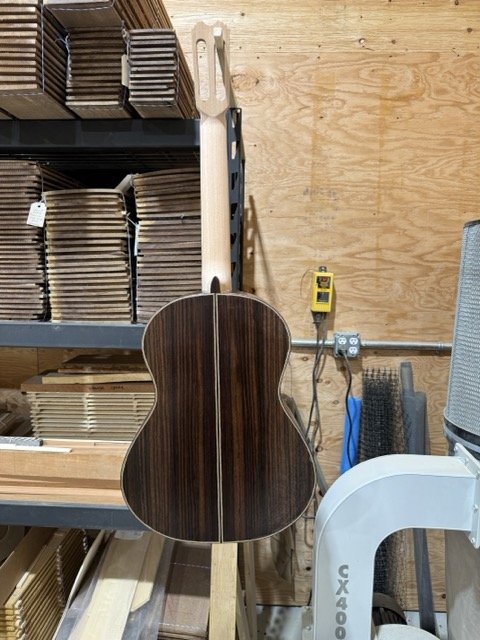
The completed back with braces
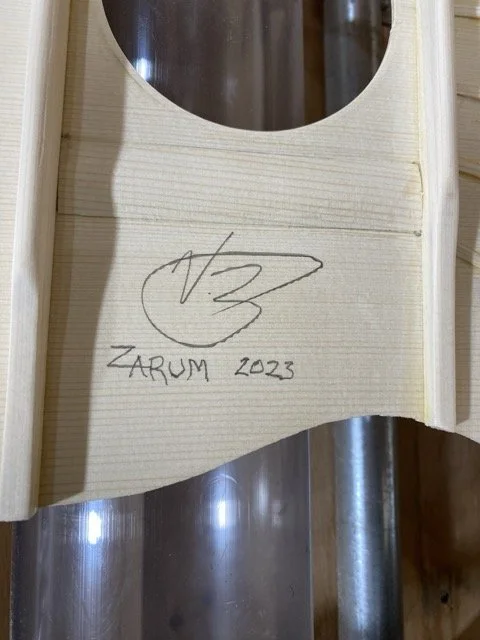
The interior of the completed soundboard is signed and dated by Zarum
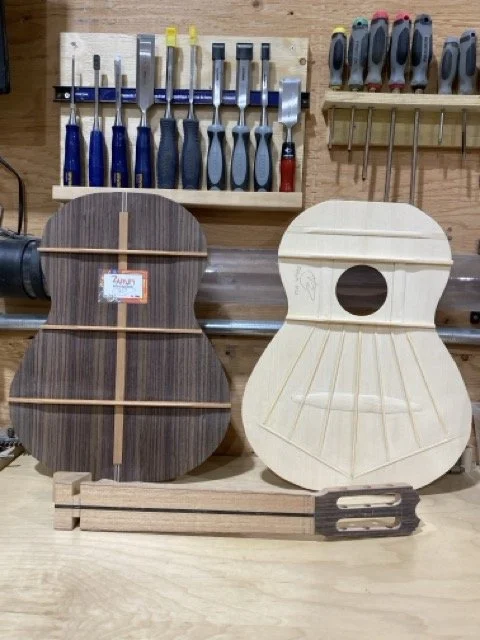
The completed soundboard and the back of the guitar shown with the Zarum label adhered to it. This label will be seen directly under the sound hole of the guitar top
The Solera shown without the sides attached
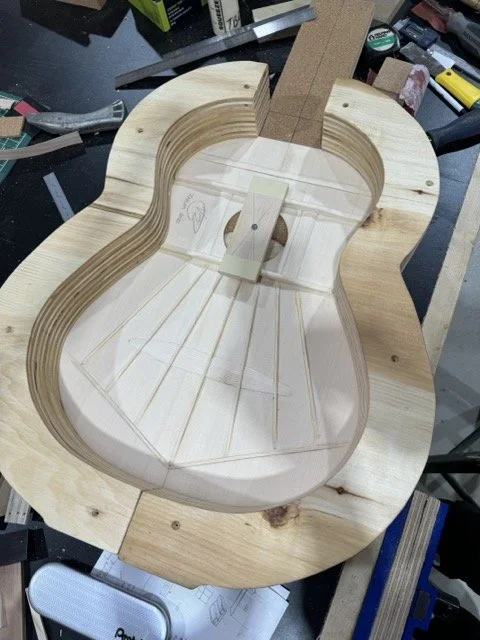
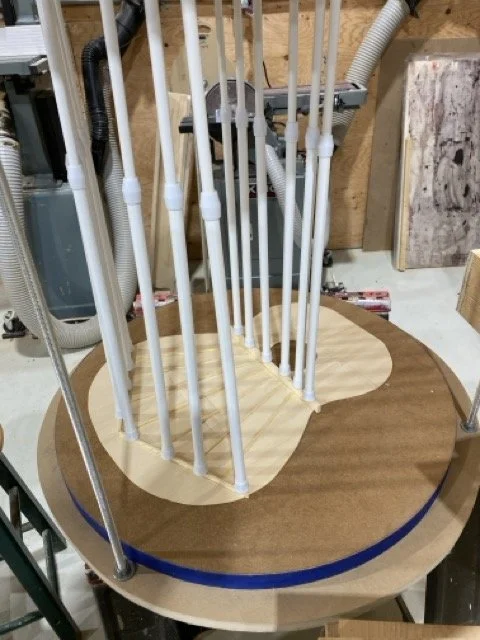
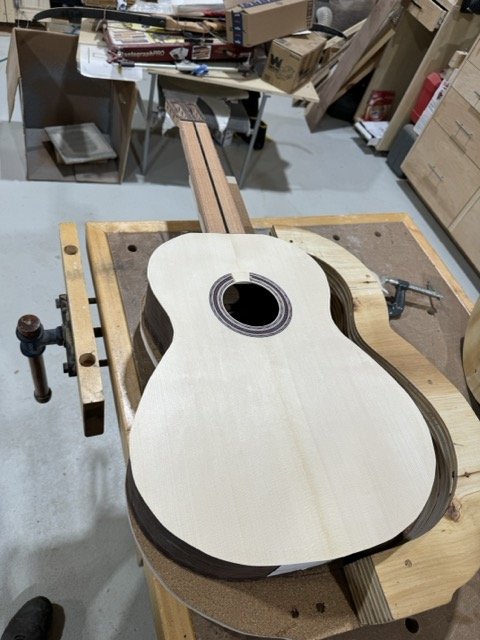
Here the sides have beed attached to the Solera after the soundboard has been properly placed in place and temporarily secured so it does not move
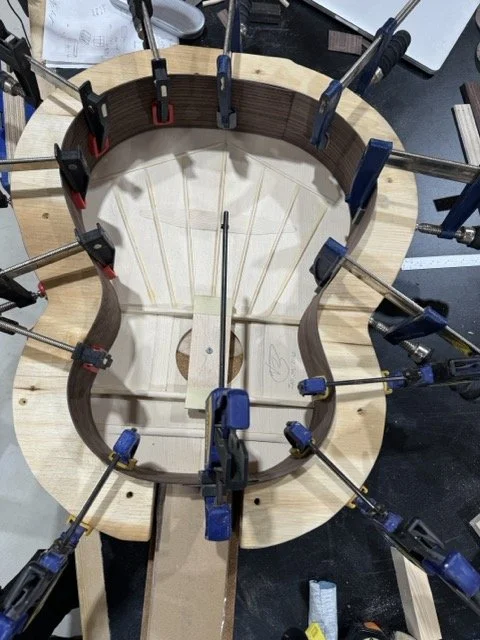
The bent sides are placed in the Solera mould on top of the sound board

The guitar neck is clamped onto the solera and glued to the sound board
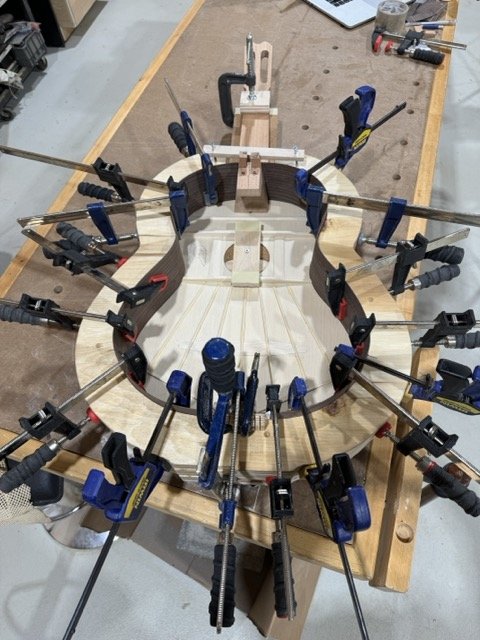
The guitar is ready to receive the small triangular Spanish cedar pieces known as 'piones' which are glued to the soundboard and the sides bonding them together
The 'piones' are glued around the whole circumference of the guitar adhering the soundboard to the sides. The strips of cedar are the glued around the circumference of the sides and held in place with these mini clamps until the glue dries
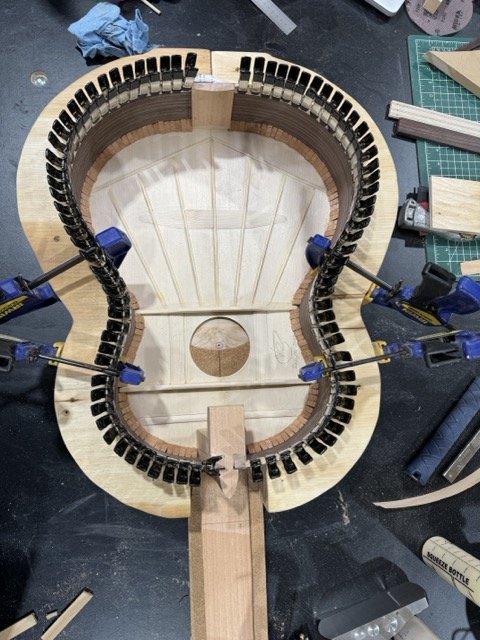
The mini clamps are removed showing the cedar strip around the sides to which the back will be glued to.
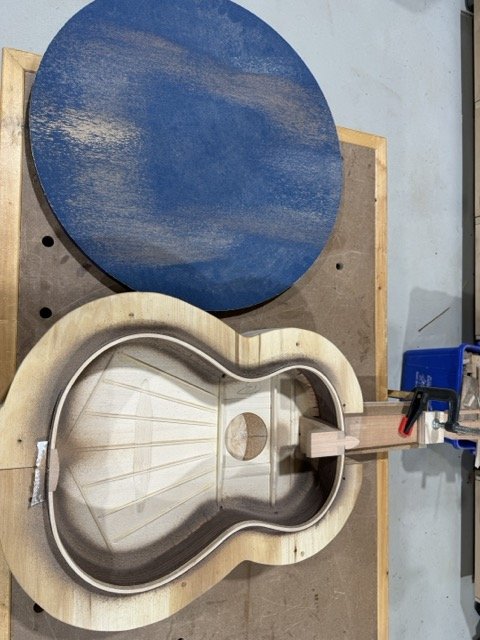
Using a large round sandpaper disk which has a 25 foot radius to it, the sides are sanded to form the proper angle in which to glue the back to
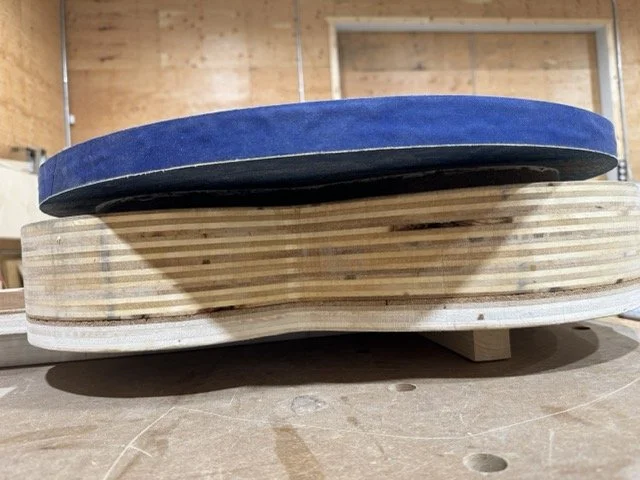
The sanding process begins with the disk carefully moved over the guitar
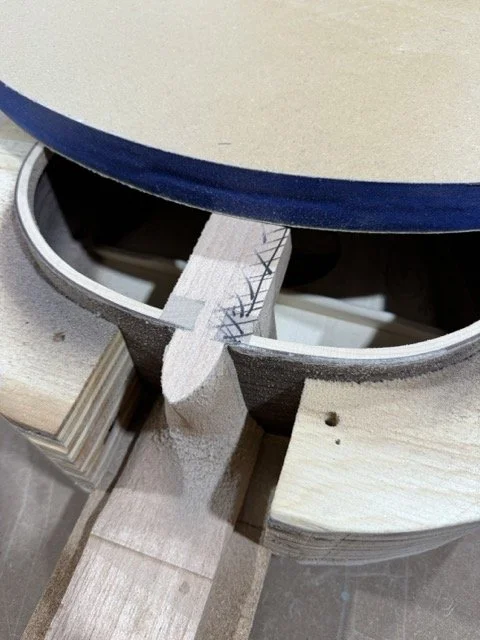
The back of the neck is scored and as the sanding continues it disappears as the proper shape is formed to glue the back to the guitar
The back is glued to the guitar
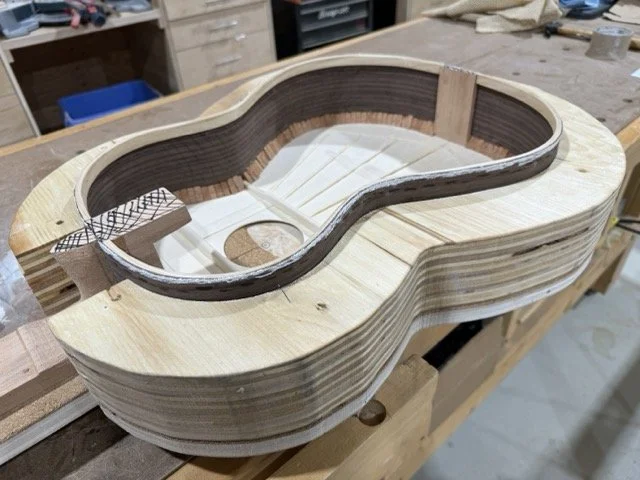
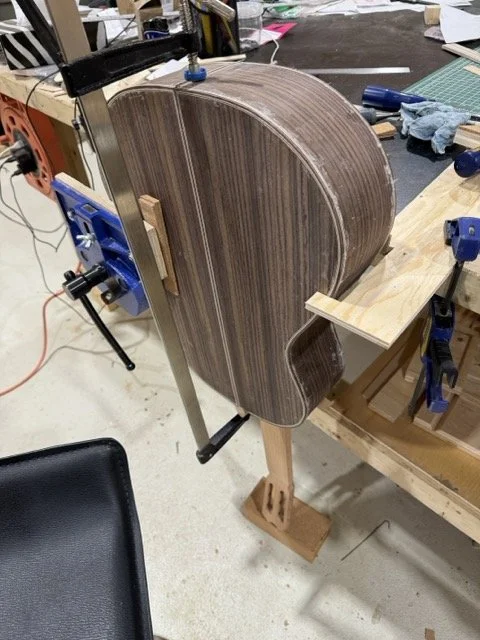
The side forms are carefully removed
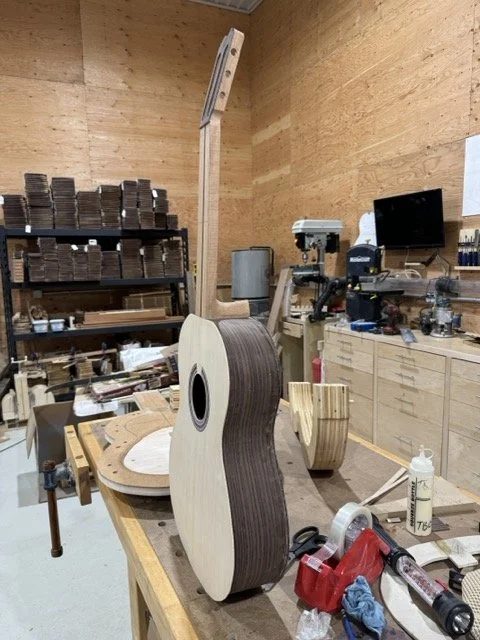
The assembled guitar is removed for the solera
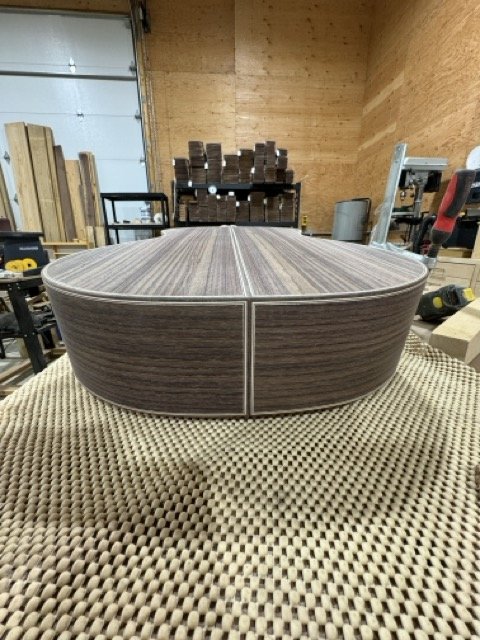
For the first time we see all the components coming together to look like a guitar
The guitar just out of the Solera

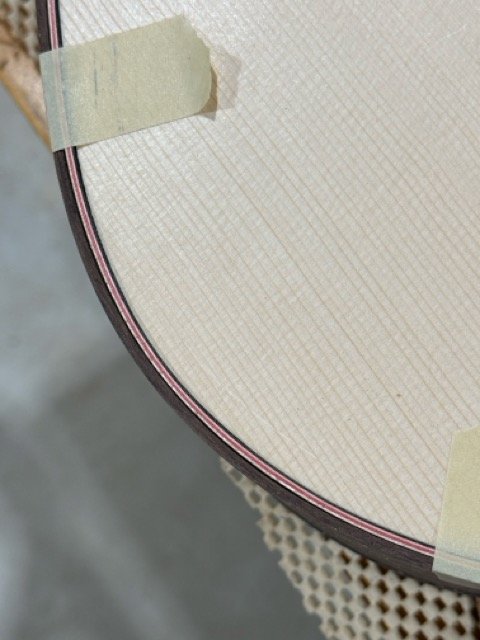
Channels are cut around the front and back of the guitar forming an area to which the binding trim pieces are to be glued to
The binding trim pieces are made using .5mm wood veneers as well as strips of the same wood as the back and sides. They are bent using the same jig that bends the sides
The channel cut for the back and sides with the binding strip to be adhered
Testing the fit of the side binding strips
Testing the fit of the side binding strips
Testing the fit of the side binding strips

The binding strips on the back and sides are glued together and held in place using a strong fibreglass reinforced tape
The back and side binding strips glued and drying
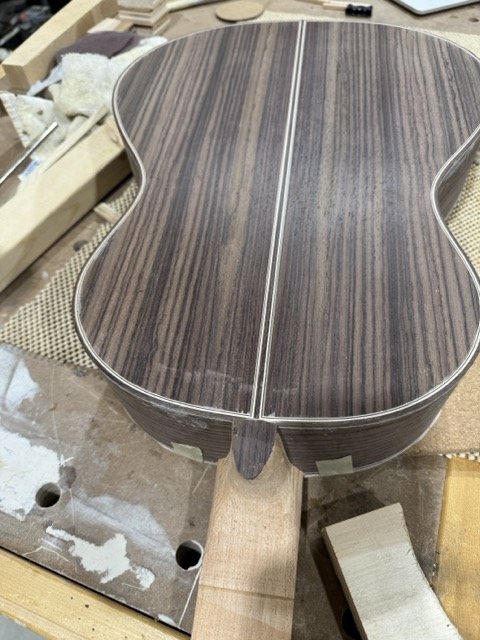
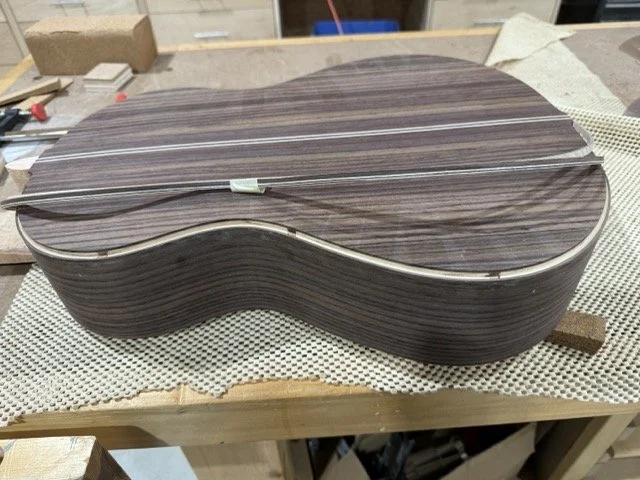
Completed back with the trim work
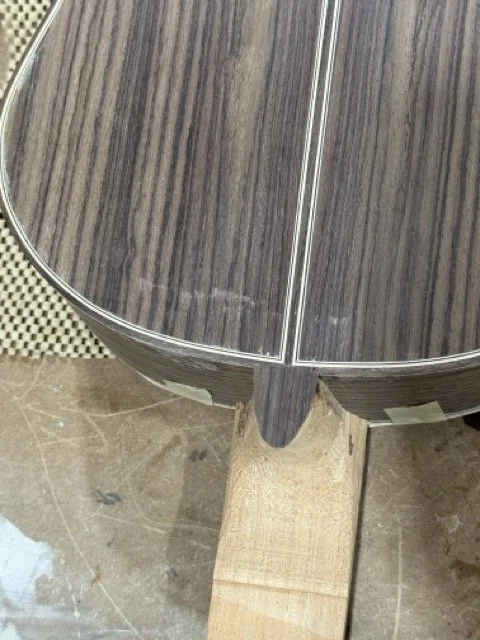
Completed back with the trim work
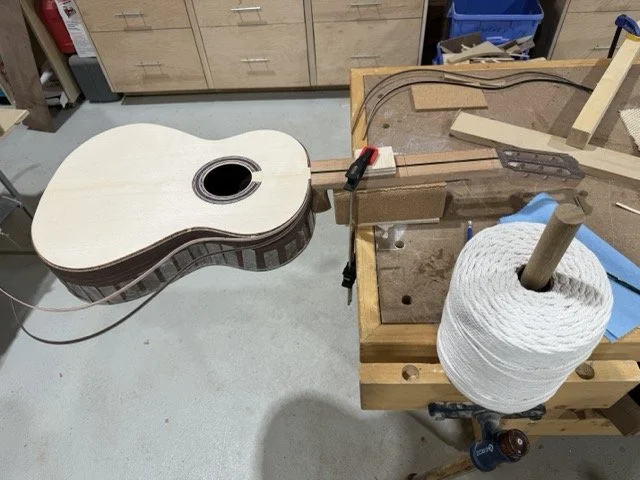
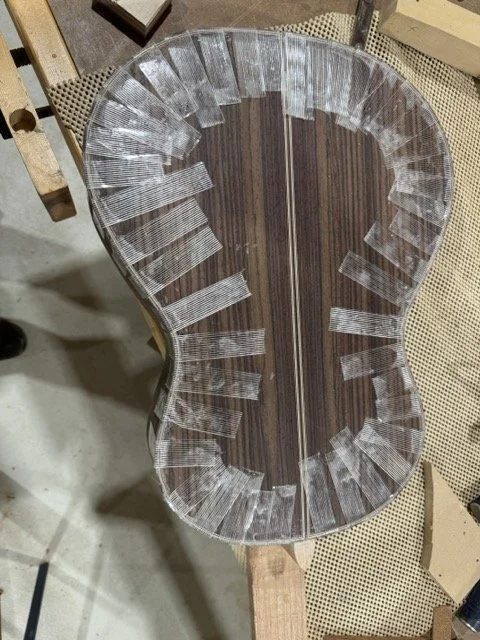
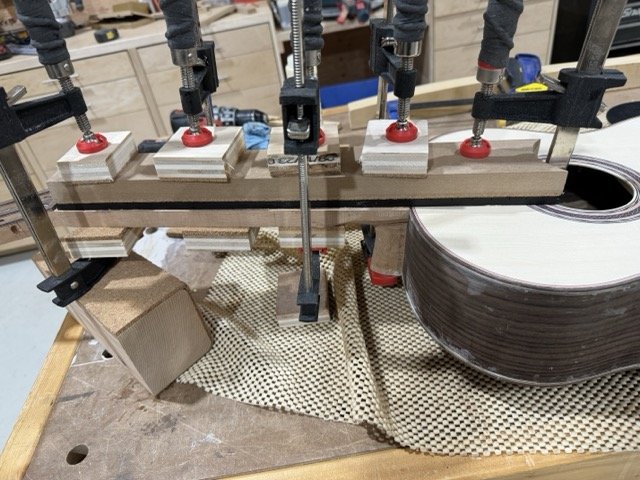
The binding strips on the front and sides of the guitar are getting ready to be glued
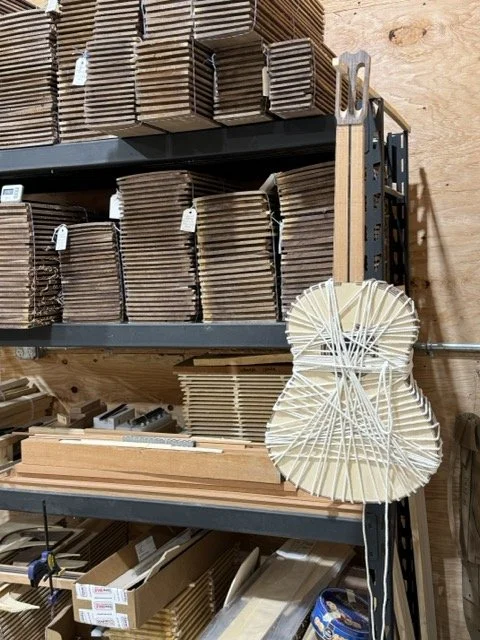
The front and side binding strips are glued and held in place to dry using the traditional method of wrapping a large diameter cotton string around the body as the strips are glued working all the way around the body
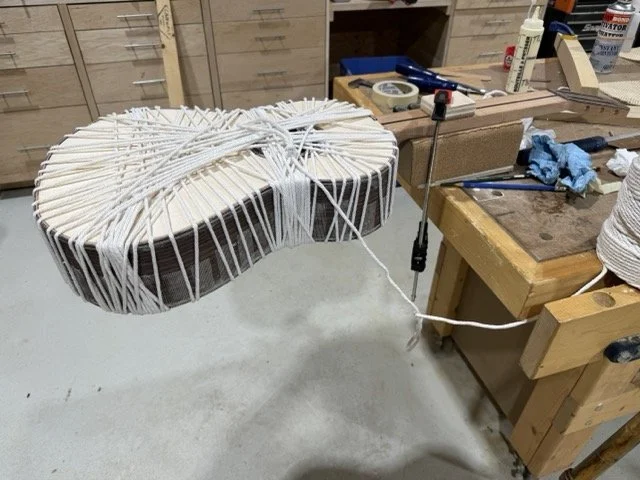
Glueing the top and side binding strips
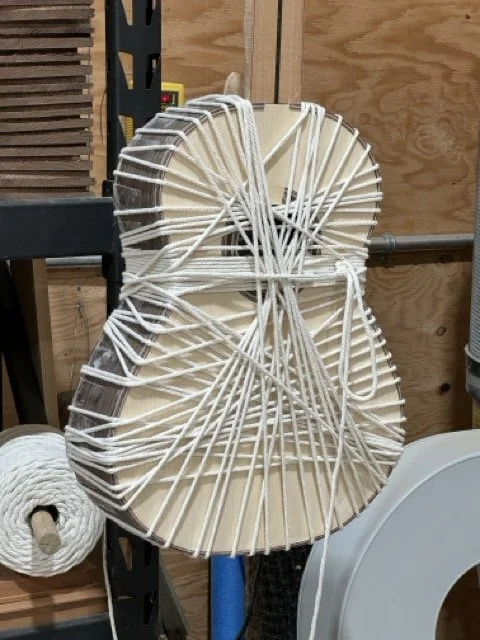
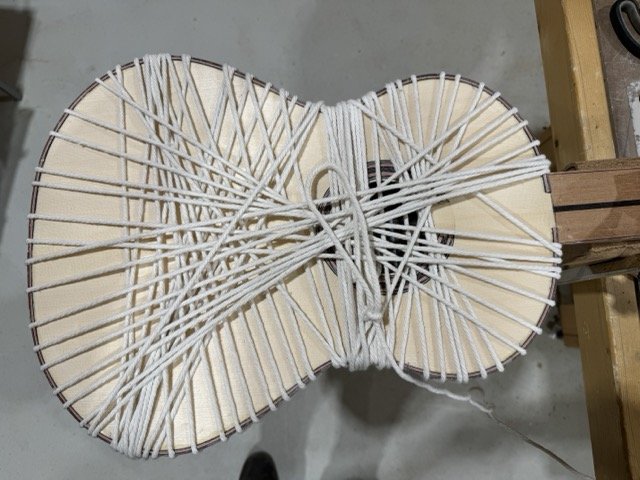
The binding strips are glued and left to dry after which the string is removed and reused in future guitars
The binding strips are glued and left to dry
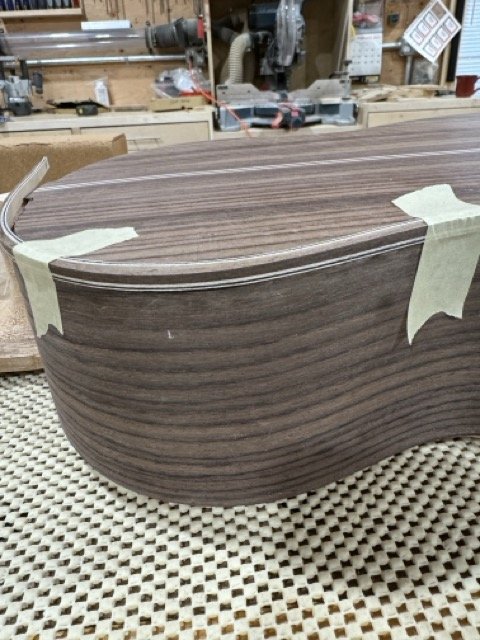
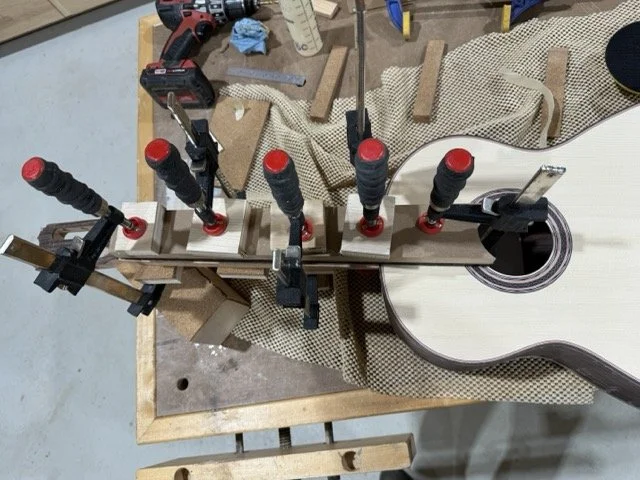
Adding binding trim to the bottom of the guitar
The binding strip at the bottom of the guitar is glued and left to dry
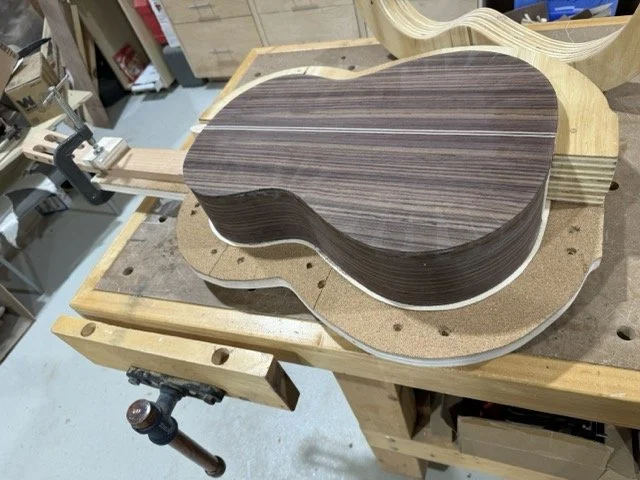
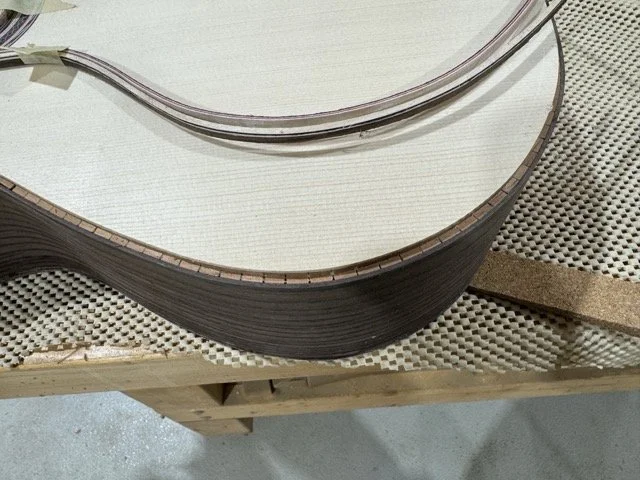
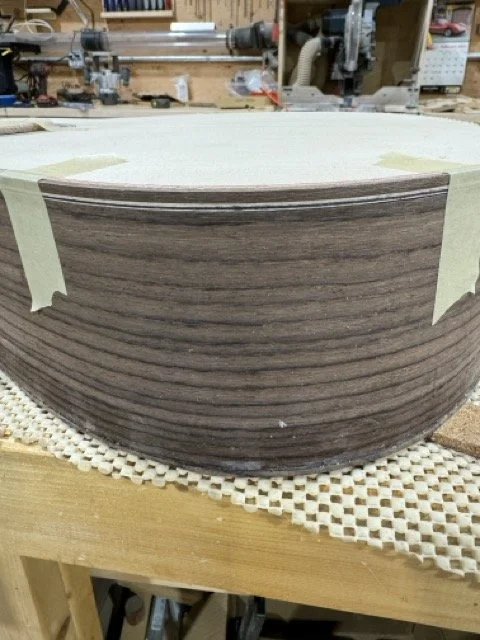
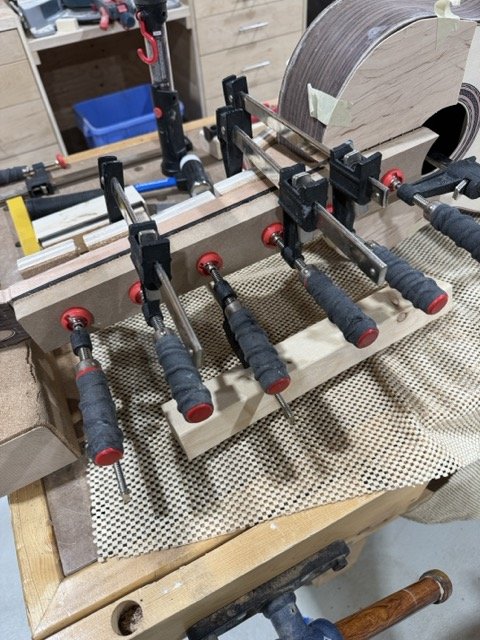
The decorative bindings are complete
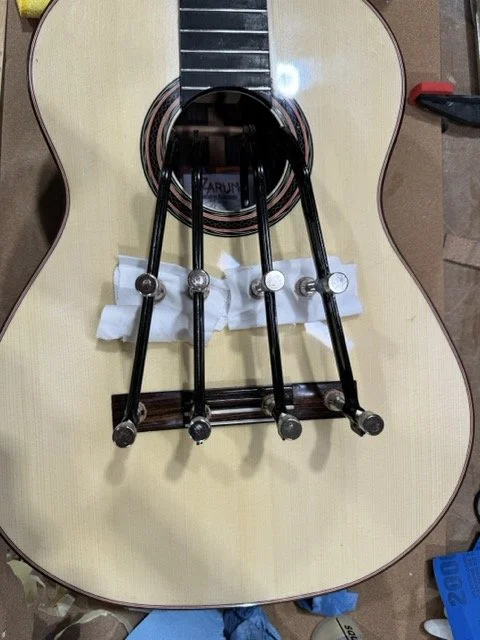
Gluing the ebony fretboard to the neck
Clamping the ebony fretboard to the neck
Clamping the ebony fretboard to the neck
Fretboard slotted and adhered to the neck

Gluing the fret board to the guitar body
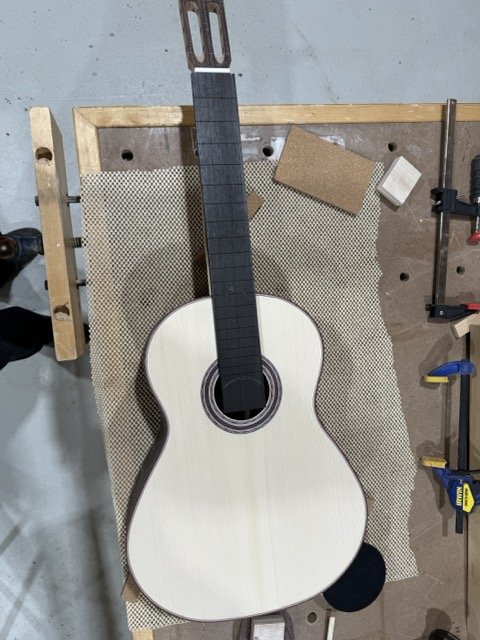
Fret board slotted and adhered to the neck with the nut at the top of the neck showing
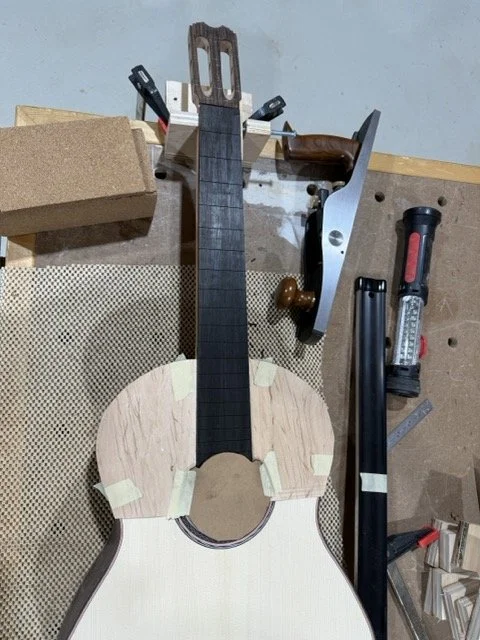
Protecting the soundboard as i shape the fret board
Using chalk and a hand plane to shape the fret board
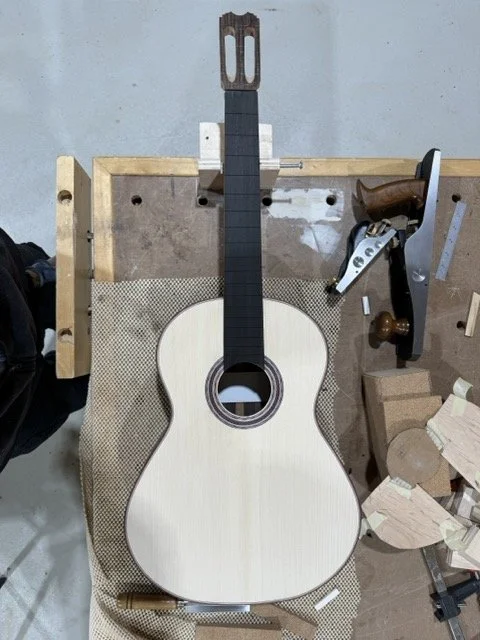
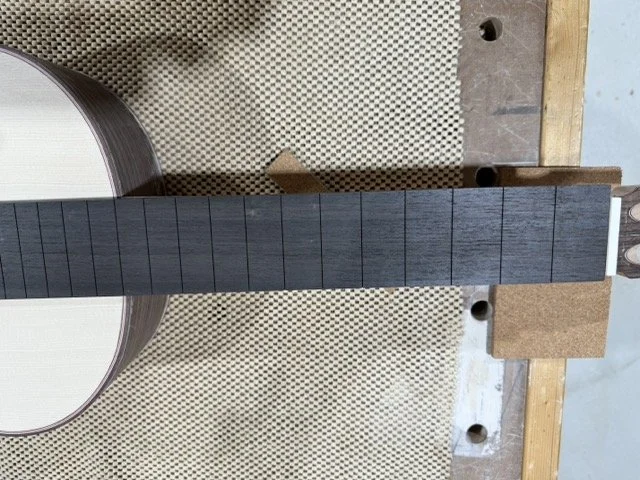
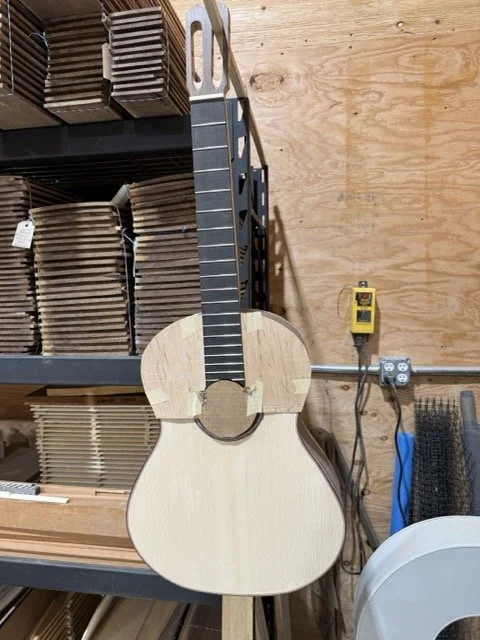
Fret board ready to receive the frets
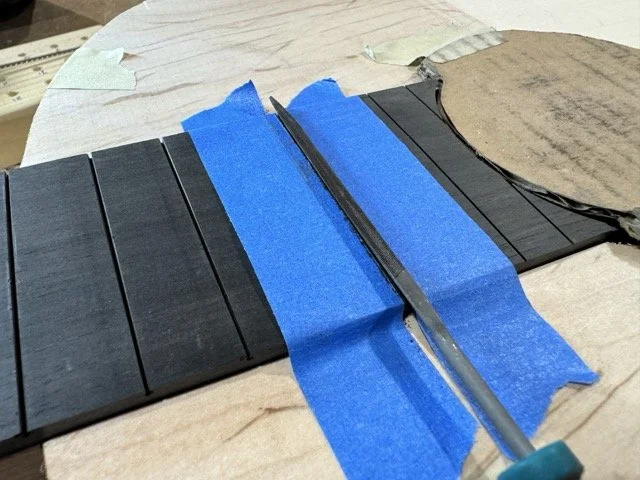
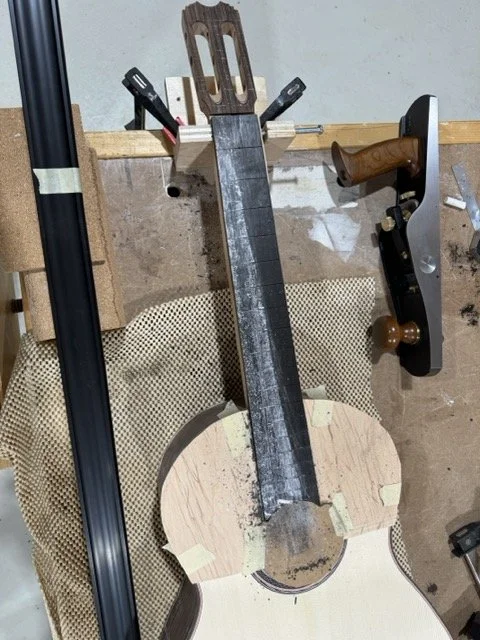
Final filing touch before inserting the frets
The guitar shown with the frets in the fret board
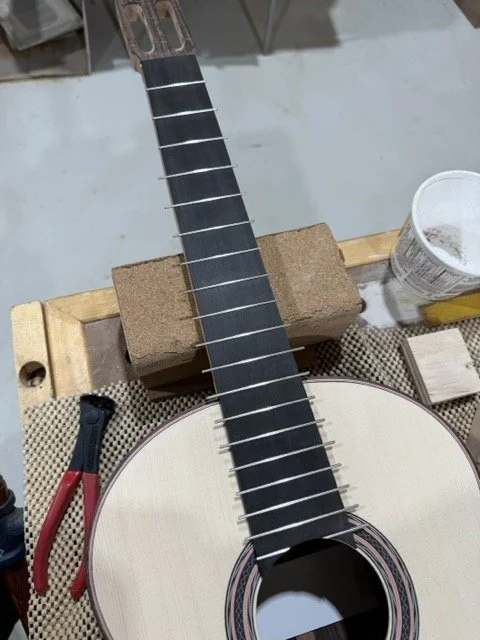
The guitar shown with the frets in the fret board
All the bridges on a Zarum guitar are hand made to perfection. Shown here is the indian rosewood bridge blank.
After the slots are cut into the bridge blank the bone saddle and other bone components are fitted. You can see the bone here is at the rough shape stage.
The bone has been carefully filed to take its final size and shape
The bridge blank in a jig ready to take on the shape using a file

The bridge blank has been rounded and trimmed along each wing
The bridge blank has been rounded and trimmed along each wing
The bridge blank has been rounded and trimmed along each wing
The bridge blank has been rounded and trimmed along each wing
Using another homemade jig, the ends of the bridge are shaped
The ends of the bridge are shaped and the bridge is ready for finish. the open slot is where the bone saddle will be placed after the bridge is blued to the guitar. The saddle is not glued.
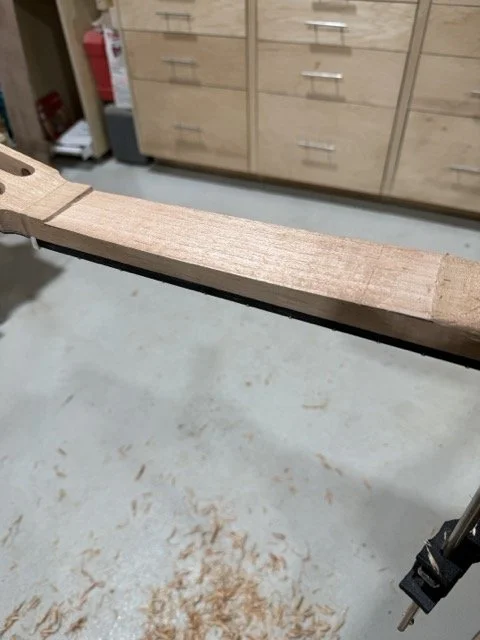
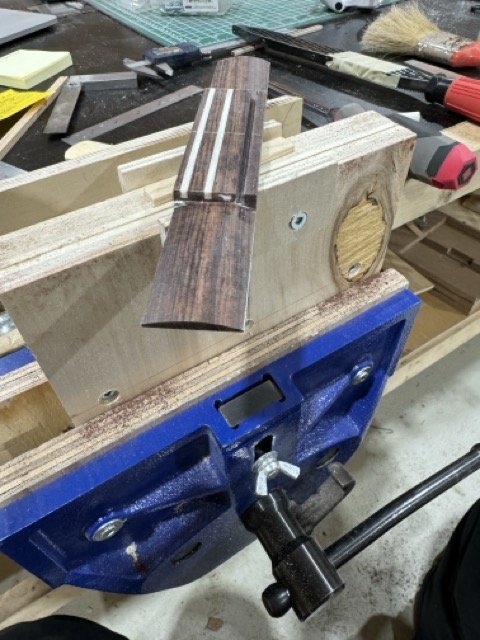
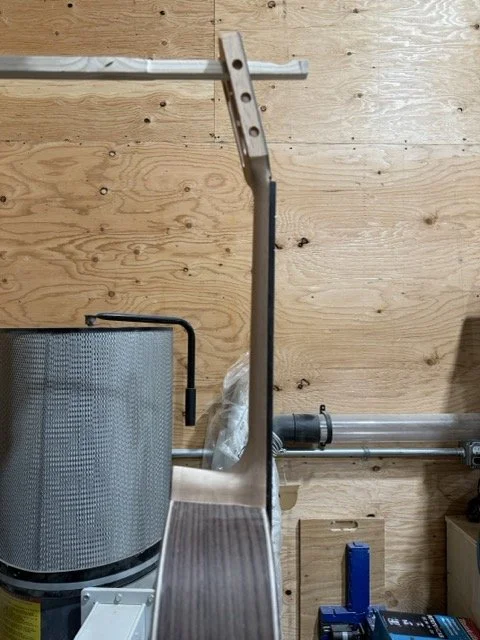
The neck needs to be shaped.

First step of shaping the neck. This is all done by hand using a variety of hand tools.
Shaping the neck. Lines are drawn to help withe the removal of material.
Shaping the neck.
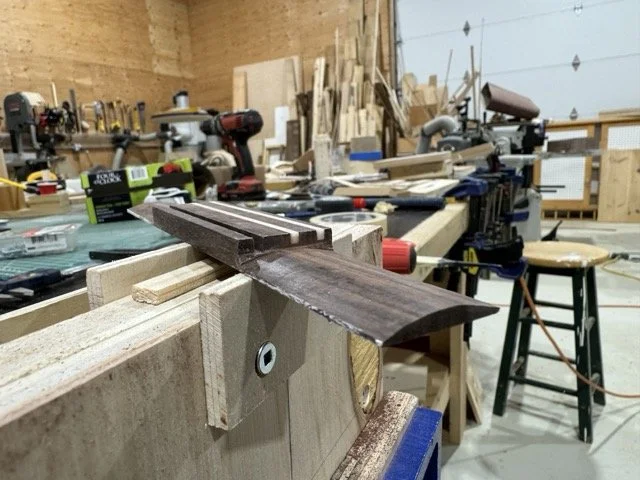
The neck is slowly and carefully rounded
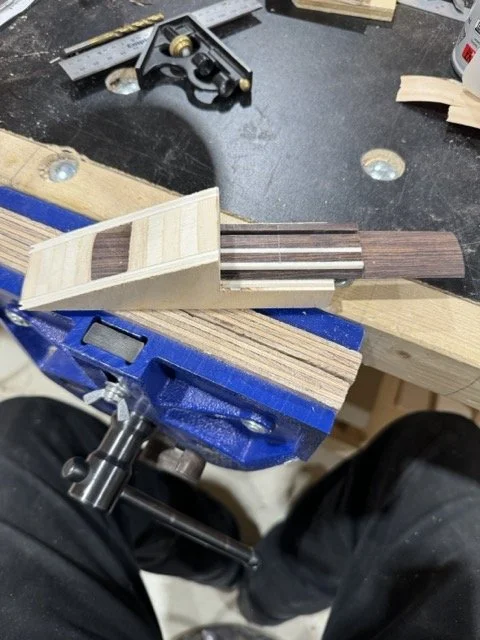
The main part of the neck is now shaped. Note the point where the head meets is still rough.
The head is now shaped to meet the neck
Shaping the heel of the neck
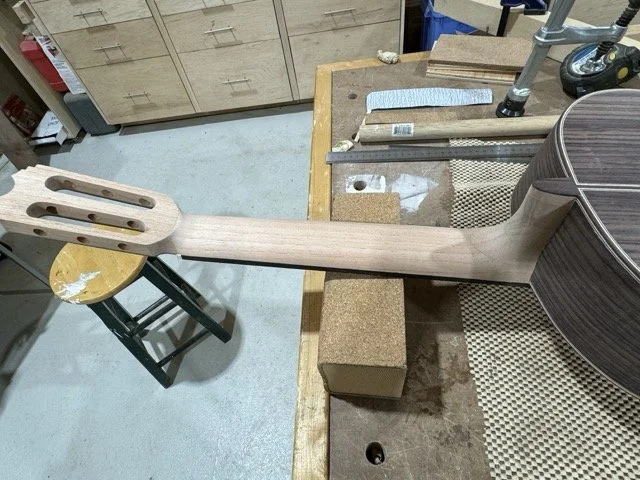
The completed neck
The completed neck
The completed neck
First coat of French Polish
The guitar has been french polished over a period of 6 weeks and is now ready to glue the bridge to the soundboard

The bridge glued to the soundboard and held in place to dry overnight using special clamps
The french polished guitar

The french polished guitar
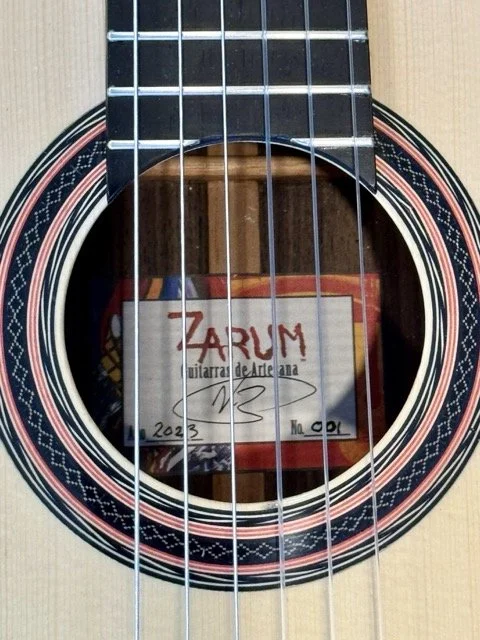
The strings are now on the finished guitar. Shown here is the Zarum Model ZCRW, Zarum Classical Rosewood, with the label showing serial number 001
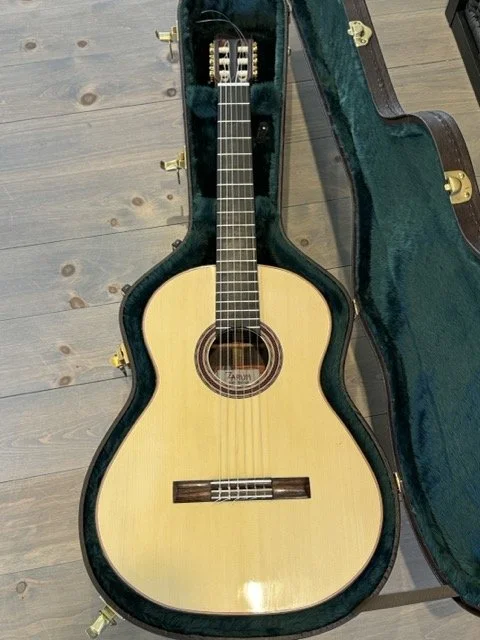
The Zarum Model ZCRW, in its hardshell case.lo
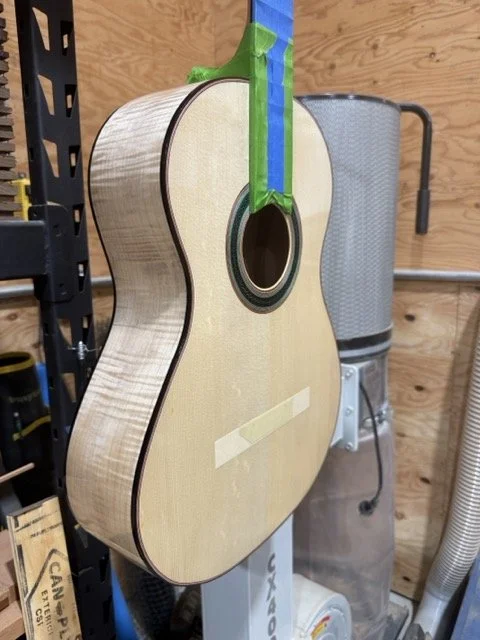
Shown here is a Zarum Flamenco model guitar with a European Spruce top and Curly Maple sides and back.
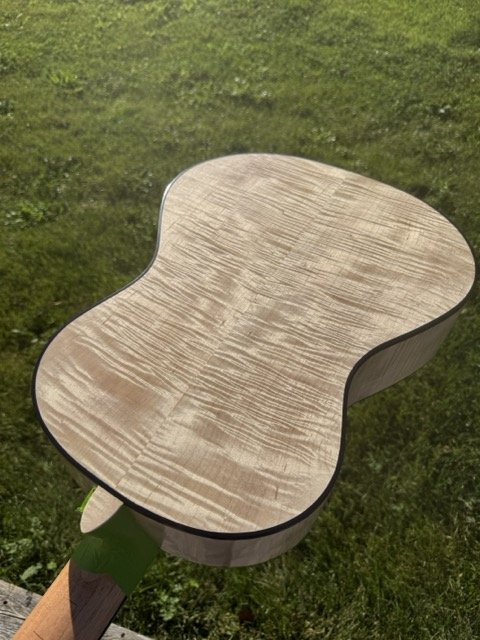
Shown here is a Zarum Flamenco model guitar showing the Curly Maple back.
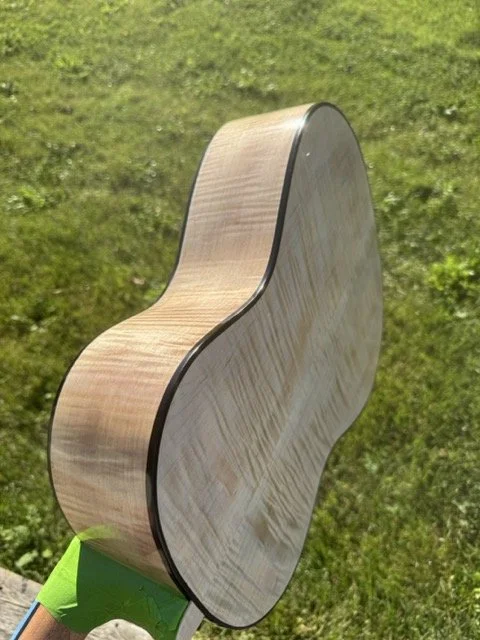
Shown here is a Zarum Flamenco model guitar showing the Curly Maple sides and back.
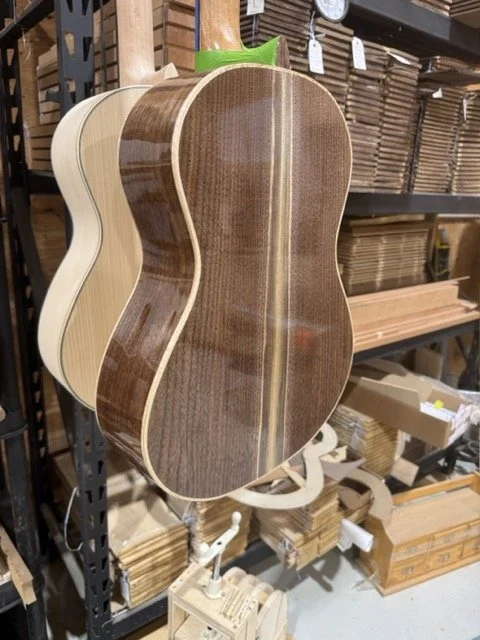
Shown is a Zarum Classical Guitar Model ZCW, Zarum Classical Walnut. The Walnut was harvested from a Zarum property and dried in the Zarum built solar kiln.
Zarum Classical Guitar Model ZCW, Zarum Classical Walnut.
A Zarum Classical model of Walnut and behind it a Zarum Flamenco Blanca model of Mediterranean Cypress
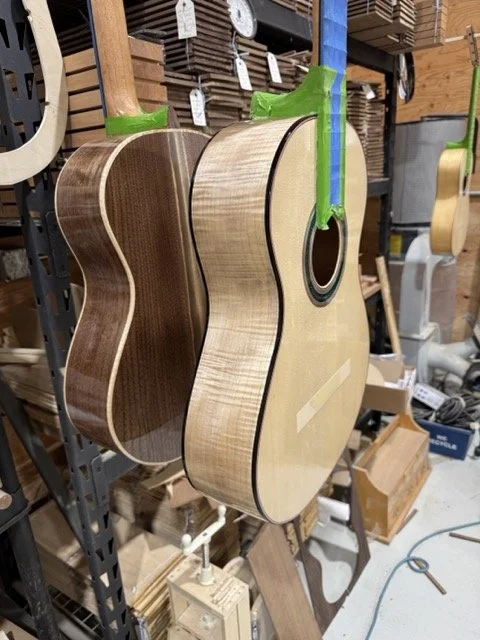
A Zarum Classical model of Walnut and in front of it is the Zarum Flamenco Blanca of European Spruce and Curly Maple sides and back.
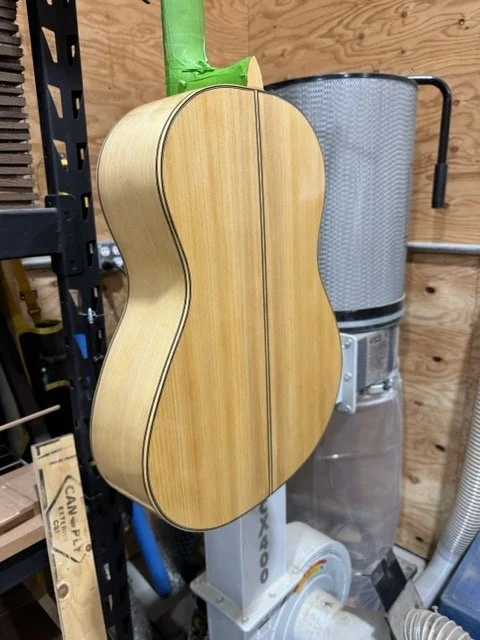
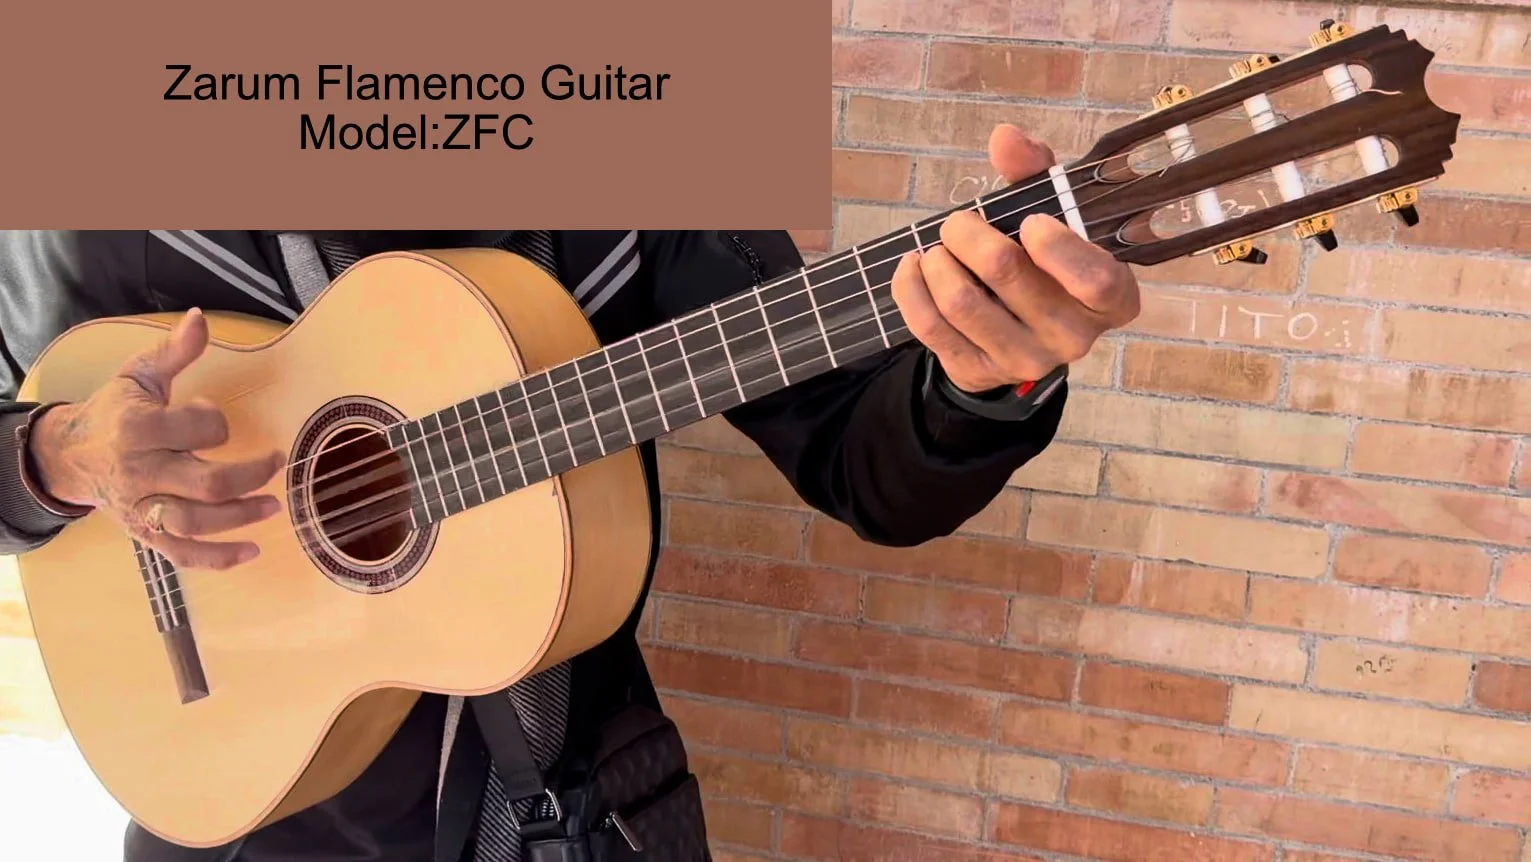
Shown is the Zarum model ZFC, Zarum Flamenco with Mediterranian Cypress back and sides.
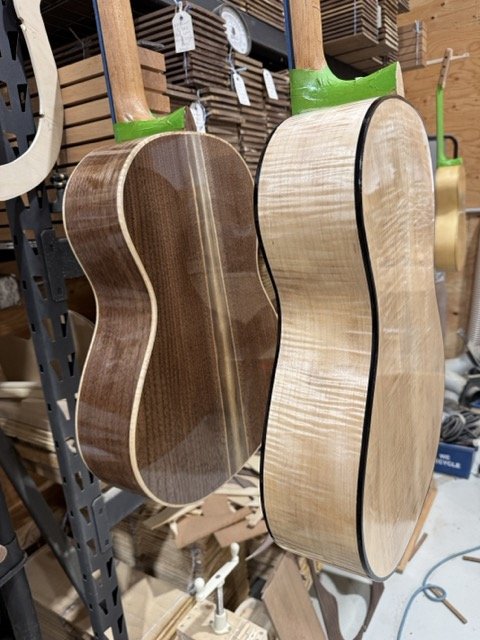
Shown are a Zarum Flamenco with Curly Maple back and sides as well as a Zarum Classical with Walnut back and sides.

Zarum guitars prepped for French Polish
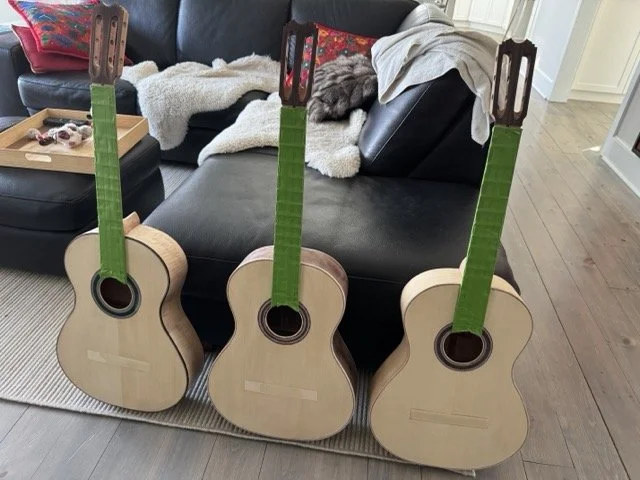
Zarum guitars prepped for French Polish
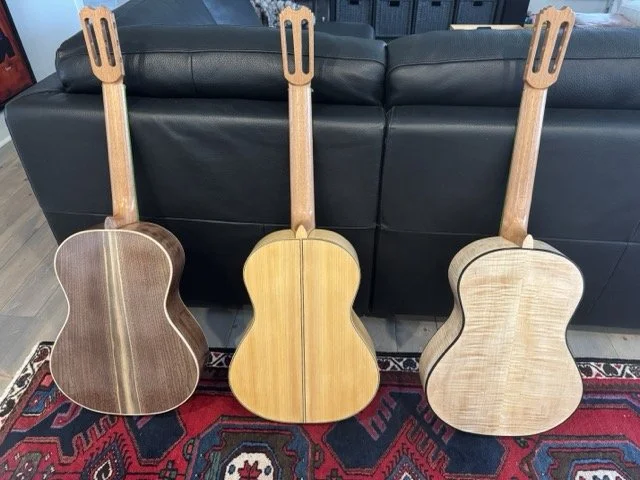
Zarum guitars in the process of French Polishing, a 6 week process.
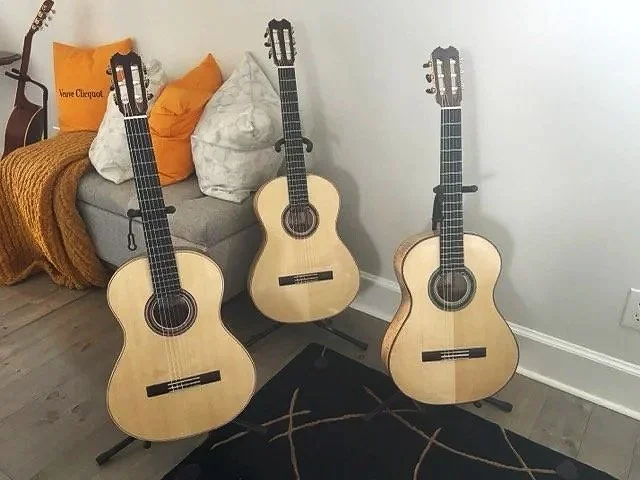
3 completed Zarum guitars.